Masoor Dal Chilla Recipe-Savory Red Lentil Pancakes
Masoor Dal Chilla | Savory Red Lentil Pancakes are a revelation in my kitchen! If you’re looking for a healthy, flavorful, and incredibly versatile breakfast or snack, you’ve stumbled upon a true gem. These delightful pancakes, made from humble red lentils, offer a satisfying, slightly earthy taste that’s utterly addictive. What makes Masoor Dal Chilla so special? It’s the perfect blend of wholesome nutrition and delightful texture. They’re naturally gluten-free and packed with protein, making them a fantastic choice for a guilt-free indulgence. I love how easily they come together, transforming simple pantry staples into something truly extraordinary. Whether you’re a seasoned cook or just starting out, mastering the art of Masoor Dal Chilla will add a vibrant new dish to your repertoire, one that’s sure to impress everyone who tries it. Prepare to fall in love with these savory red lentil pancakes!
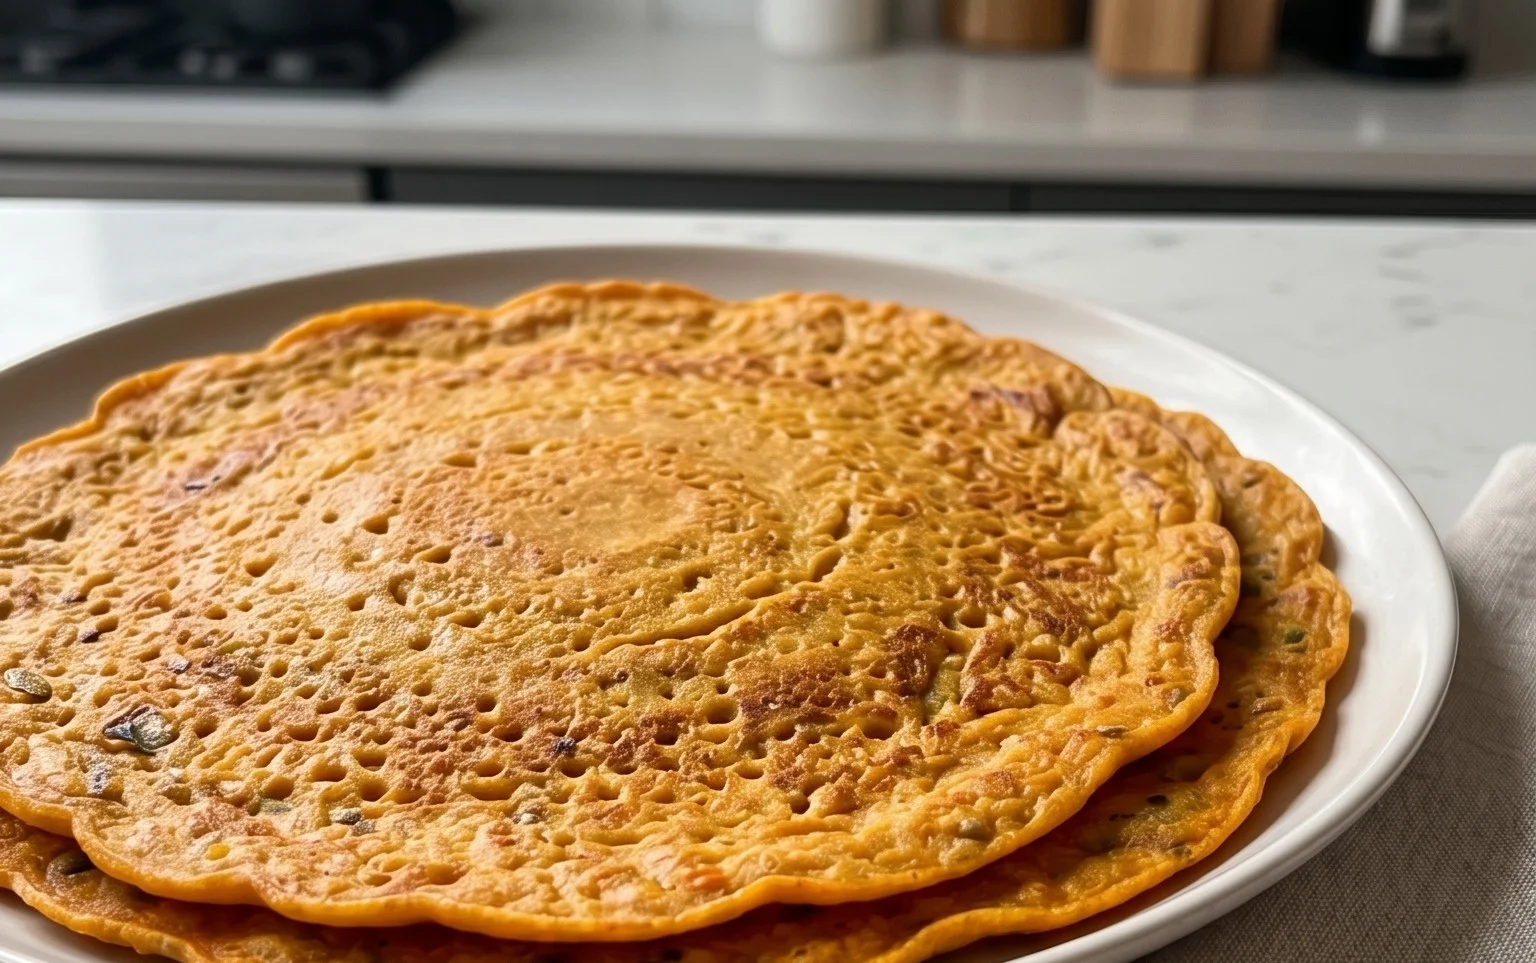
Masoor Dal Chilla | Savory Red Lentil Pancakes
Welcome to a delightful and healthy recipe that’s perfect for breakfast, lunch, or a light dinner – Masoor Dal Chilla! These savory pancakes, also known as dosas or crepes in other Indian cuisines, are made from simple red lentils and are incredibly nutritious and satisfying. They’re naturally gluten-free and packed with protein, making them a fantastic option for anyone looking for a wholesome meal. I love how versatile they are; you can enjoy them plain or with your favorite chutney, yogurt, or even a side of sabzi (vegetable curry). Let’s dive into how easy it is to whip up these delicious pancakes!
Ingredients:
Preparation and Grinding the Batter
The first step to making perfect Masoor Dal Chillas is preparing the lentil batter. This isn’t complicated at all, but it does require a bit of foresight as the lentils need to soak.
1. Soaking the Masoor Dal: Take your 1 cup of split red lentils (masoor dal) and rinse them thoroughly under cold running water. You want to wash them until the water runs clear. This helps remove any dust or impurities. Once rinsed, place the lentils in a bowl and add 3 cups of fresh water. Let them soak for at least 2-3 hours. If you’re in a warmer climate, you might even get away with a shorter soaking time, but 2-3 hours is a good standard. Soaking is crucial because it softens the lentils, making them easier to grind into a smooth batter and also aids in digestion.
2. Grinding the Batter: After the lentils have soaked, drain all the soaking water. Now, transfer the soaked lentils into a blender or a food processor. Add the green chilli (you can adjust this according to your spice preference; remove the seeds for less heat) and the 1-inch piece of gin extractger. We’re going to grind this into a smooth paste. Start by adding about half of the ½ cup of water (¼ cup) to help the blades move. Blend until you have a smooth, thick batter, similar in consistency to pancake batter or dosa batter. If the batter is too thick and the blender is struggling, add the remaining ¼ cup of water gradually, a tablespoon at a time, until you achieve a smooth, pourable consistency. Be careful not to add too much water, or your chillas might become too thin and tear easily.
3. Seasoning and Resting: Once you have your smooth batter, pour it into a bowl. Add the 1 teaspoon of kosher salt to the batter and mix well. Now, for that fresh burst of flavor, stir in the 2 tablespoons of finely chopped cilantro. The cilantro not only adds color but also a wonderful aroma and taste. At this point, you can choose to use the batter immediately, or for an even better texture and flavor, let it rest for about 15-30 minutes. This resting period allows the flavors to meld together and the lentils to further hydrate, resulting in a more tender chilla.
Cooking the Masoor Dal Chillas
Now for the exciting part – cooking these delicious pancakes! It’s a simple process, much like making any other crepe or pancake, but with a unique Indian twist.
4. Heating the Pan: Place a non-stick skillet or a cast-iron griddle over medium heat. You want the pan to be hot enough so that a drop of water sizzles and evaporates quickly, but not so hot that it burns the batter instantly. To ensure the chillas don’t stick, add about 1 teaspoon of oil to the pan and swirl it around to coat the surface. If you’re using a non-stick pan, you might need less oil. It’s important to get the temperature just right – too low and the chilla might stick or become rubbery; too high and it will cook too quickly on the outside and remain uncooked inside.
5. Pouring and Spreading the Batter: Once the pan is hot and lightly oiled, give your batter a quick stir. Ladle about ½ cup of the batter onto the center of the hot pan. Immediately, using the back of the ladle or a spatula, gently spread the batter in a circular motion, outwards from the center, to create a thin, even circle. Aim for a diameter of about 6-8 inches, depending on your preference and the size of your pan. Work quickly but gently to avoid tearing the batter. You’ll notice the edges start to cook and lift slightly as you spread.
6. Cooking the First Side: Let the chilla cook undisturbed for about 2-3 minutes, or until you see small bubbles forming on the surface and the edges begin extract to look dry and golden brown. You can gently lift an edge with a spatula to peek underneath – it should be a beautiful golden color. This is your cue to add the remaining oil. Drizzle about ½ teaspoon to 1 teaspoon of oil around the edges of the chilla and a little in the center if you like. This helps in achieving a crispier texture.
7. Flipping and Cooking the Second Side: Carefully slide a thin spatula underneath the chilla and gently flip it over. Cook the other side for another 1-2 minutes, or until it’s also golden brown and cooked through. The masoor dal chilla cooks relatively quickly due to the thinness of the batter and the nature of the lentils. Once both sides are beautifully golden and cooked, it’s ready to be served.
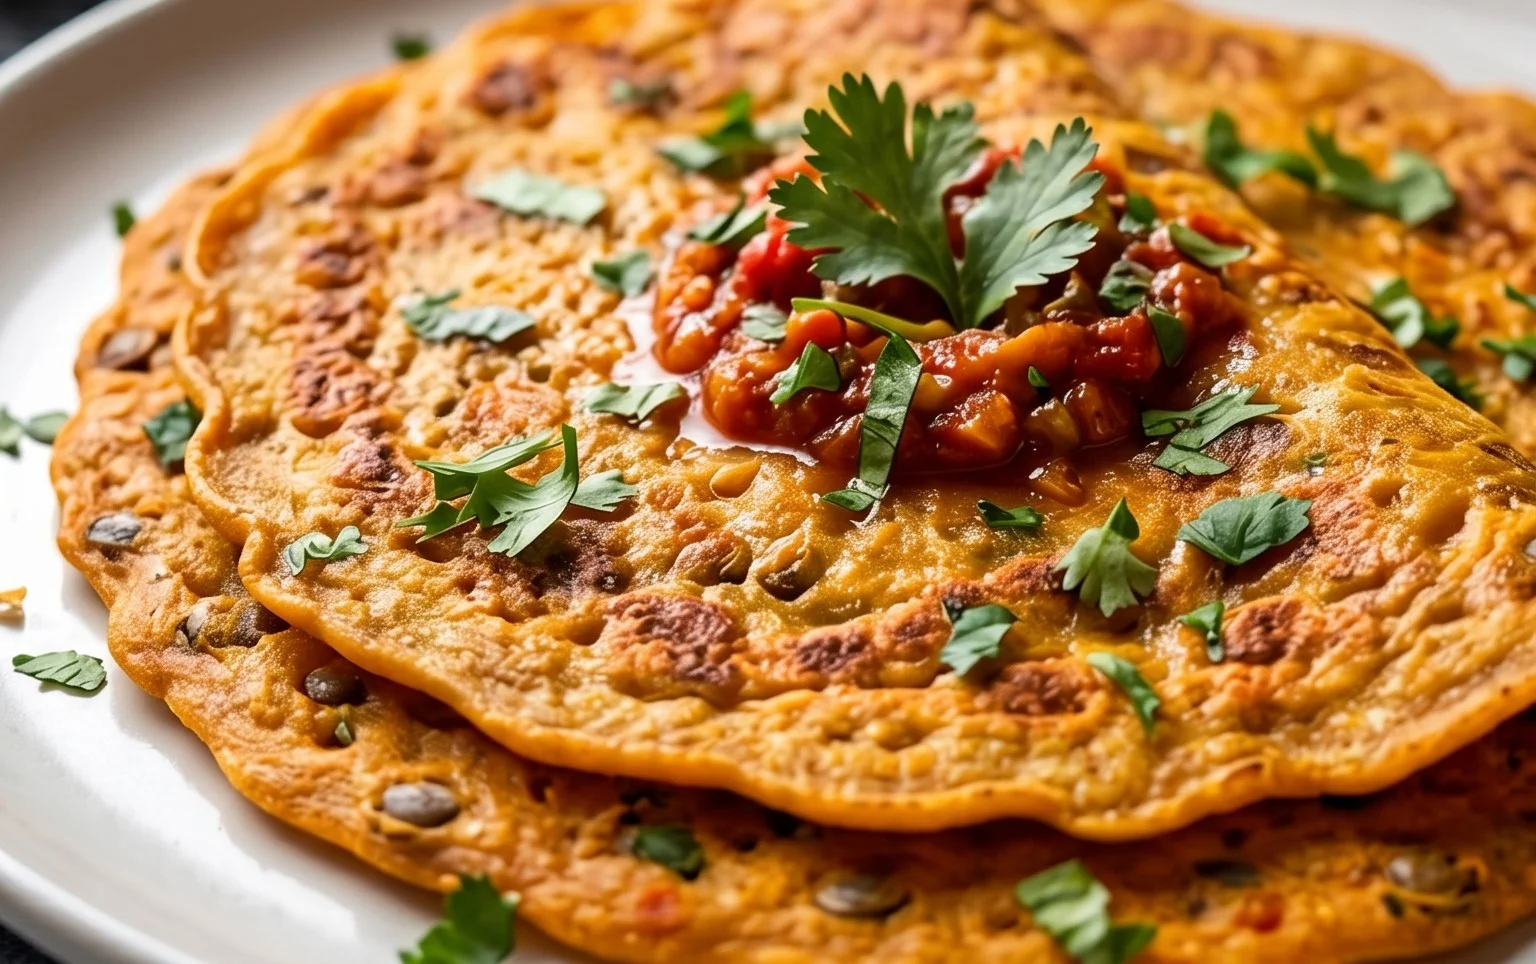
8. Serving the Chillas: Remove the cooked chilla from the pan and place it on a plate. You can serve these Masoor Dal Chillas immediately. They are absolutely delicious served hot with a side of plain yogurt, a dollop of pickle, or your favorite Indian chutney, such as mint-coriander chutney or tamarind chutney. You can also serve them with a simple vegetable stir-fry or a light dal. For a more substantial meal, you can even fill them with some spiced potatoes or paneer. Enjoy the delightful, slightly nutty flavor and the satisfying texture of your homemade Masoor Dal Chillas! They are a testament to how simple ingredients can create something truly special and nourishing.
Conclusion:
I hope you’re as excited as I am to try this delicious Masoor Dal Chilla recipe! This is truly a fantastic and healthy way to enjoy red lentils. It’s incredibly versatile, making it perfect for a quick breakfast, a light lunch, or even a satisfying snack. The beautiful golden color and the subtly spiced, savory flavor make these Masoor Dal Chillas a delight for both the eyes and the palate. They are naturally gluten-free and packed with protein, making them a wholesome choice for everyone.
The beauty of this Masoor Dal Chilla lies in its simplicity and adaptability. I love serving them hot off the griddle with a dollop of cool yogurt or a vibrant mint chutney. A side of simple sautéed vegetables or a fresh salad also complements them beautifully. For those who enjoy a little heat, feel free to amp up the green chilies or add a pinch of red chili powder to the batter. You can also introduce finely chopped onions, tomatoes, or bell peppers directly into the batter for added texture and flavor. Don’t be afraid to experiment!
So, gather your ingredients, get your batter ready, and dive into creating these delightful savory red lentil pancakes. I am confident you’ll find them incredibly rewarding and a staple in your recipe repertoire. Give this Masoor Dal Chilla a try – I promise you won’t regret it!
Frequently Asked Questions:
Can I make the batter ahead of time?
Yes, you absolutely can! The Masoor Dal Chilla batter can be stored in an airtight container in the refrigerator for up to 2 days. It might thicken slightly, so you can thin it out with a tablespoon or two of water before cooking if needed. This makes busy mornings even easier!
What are some other serving ideas for Masoor Dal Chilla?
Beyond the classic yogurt and chutneys, consider serving your Masoor Dal Chilla with a spicy pickle, a side of scrambled eggs for a protein boost, or even as a base for a savory topping like avocado and salsa. They are also delicious folded over with some cheese or finely shredded vegetables.
Masoor Dal Chilla | Savory Red Lentil Pancakes
Delicious and healthy savory pancakes made from red lentils, spiced with green chili and ginger.
Ingredients
-
1 cup split red lentils (masoor dal)
-
3 cups water (for soaking lentils)
-
1 green chilli
-
1 inch ginger
-
1 teaspoon kosher salt
-
½ cup water (for grinding)
-
2 tablespoons cilantro (finely chopped)
-
2 tablespoons oil
Instructions
-
Step 1
Rinse the split red lentils thoroughly and soak them in 3 cups of water for at least 12 hours or overnight. -
Step 2
Drain the soaked lentils completely. Add them to a blender along with the green chili, ginger, and kosher salt. -
Step 3
Add ½ cup of water to the blender and grind the mixture into a smooth batter. If needed, add a little more water to achieve a pouring consistency, similar to pancake batter. -
Step 4
Stir in the finely chopped cilantro into the batter. -
Step 5
Heat 1 tablespoon of oil in a non-stick skillet or griddle over medium heat. Pour a ladleful of batter onto the hot skillet and spread it in a circular motion to form a thin pancake. -
Step 6
Cook for about 2-3 minutes until the edges start to lift and the bottom is golden brown. Flip the chilla and cook the other side for another 1-2 minutes. -
Step 7
Repeat with the remaining batter, adding more oil as needed. Serve hot.
Important Information
Nutrition Facts (Per Serving)
It is important to consider this information as approximate and not to use it as definitive health advice.
Allergy Information
Please check ingredients for potential allergens and consult a health professional if in doubt.