Cheesy Zucchini Breadsticks – Easy & Delicious Recipe
Cheesy Zucchini Breadsticks are about to become your new favorite snack. Seriously, if you’re looking for a way to sneak some extra veggies into your life without anyone even noticing, this is it! I’ve always been a fan of anything cheesy, and when you combine that irresistible savory goodness with the mild flavor and tender texture of zucchini, magic happens. These aren’t your average breadsticks; they’re a delightful twist that makes them incredibly versatile. Perfect for game nights, a light lunch, or even as a side dish to your favorite soup or salad, our Cheesy Zucchini Breadsticks are sure to be a hit with everyone. What makes them truly special is how effortlessly they transform humble zucchini into a craveable treat, proving that healthy can absolutely be delicious and incredibly satisfying.
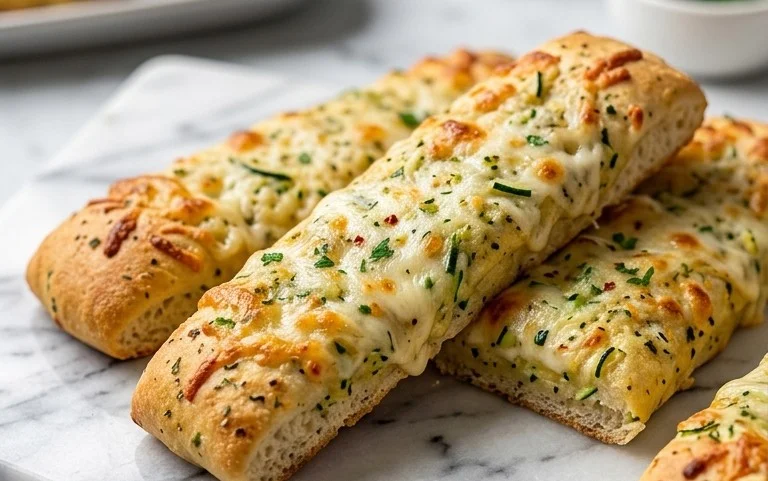
Cheesy Zucchini Breadsticks
Are you looking for a delicious and surprisingly healthy way to use up that abundance of zucchini from your garden or farmer’s market? Look no further! These Cheesy Zucchini Breadsticks are a revelation. They’re incredibly easy to make, packed with flavor, and a fantastic way to sneak in some extra vegetables. Forget your usual breadsticks; these are a game-changer that the whole family will love, whether as an appetizer, a side dish, or even a light snack. The zucchini adds a wonderful moisture and a subtle, earthy sweetness that perfectly complements the savory cheeses and aromatic seasonings.
Ingredients:
Cooking Instructions:
The magic of these cheesy zucchini breadsticks lies in their simplicity and the delightful texture they achieve. We’re essentially creating a base from grated zucchini, binding it together with an egg and cheeses, and then baking it until golden and irresistible. The key is to manage the moisture from the zucchini effectively to ensure a pleasant, not soggy, outcome.
Preparing the Zucchini
The first crucial step is preparing your zucchini. You’ll need about 4 cups of grated zucchini, which typically comes from two medium to large zucchini. I find that using the large holes of a box grater works best. Once grated, the zucchini will release a significant amount of liquid. To achieve the best texture for our breadsticks, it’s essential to squeeze out as much of this excess moisture as possible. You can do this by placing the grated zucchini in a fine-mesh sieve set over a bowl and pressing down with the back of a spoon. For even better results, I like to wrap the grated zucchini in a clean kitchen towel or cheesecloth and wring it out firmly. This step might seem tedious, but it’s vital for creating breadsticks that are firm and hold their shape, rather than turning into a mushy mess. Don’t be surprised by how much liquid comes out – it’s completely normal!
Mixing the Dough
Once your zucchini is well-drained, it’s time to combine the ingredients. In a medium mixing bowl, add the squeezed zucchini. Now, let’s introduce the flavor and binding agents. Add the ½ cup of shredded mozzarella cheese and the ⅓ cup of finely shredded Parmesan cheese. These cheeses will not only contribute to the cheesy flavor but also help bind the mixture together. Next, crack in your large egg. The egg acts as a crucial binder, holding all the ingredients in our zucchini mixture. For seasoning, sprinkle in the dried Italian seasoning, which typically includes a blend of oregano, basil, thyme, and rosemary, offering a wonderful aromatic depth. Then, add the ½ teaspoon of salt and ½ teaspoon of garlic powder. You can adjust the salt and garlic powder to your preference, but this combination provides a balanced savory profile that complements the zucchini and cheese beautifully. Mix everything together thoroughly until all the ingredients are well incorporated. The mixture will be quite moist and sticky, but this is exactly what we’re aiming for.
Forming the Breadsticks
Now for the fun part – forming our breadsticks! Preheat your oven to 400°F (200°C). Line a baking sheet with parchment paper. This step is important to prevent sticking and makes cleanup a breeze. You can then either spoon the mixture onto the prepared baking sheet and try to shape it into breadstick forms, or for a cleaner approach, use your hands. Lightly dampen your hands with water or a little bit of cooking spray to prevent the mixture from sticking. Take portions of the zucchini mixture and shape them into long, thin breadstick shapes, approximately ½ inch thick and 6-8 inches long. You can also make them a little thicker or thinner depending on your preference for crispiness. Try to make them relatively uniform in size so they bake evenly.
Baking to Golden Perfection
Once your breadsticks are formed and arranged on the baking sheet, it’s time to add the final layer of cheesy goodness. Sprinkle the remaining 1 cup of finely shredded mozzarella cheese evenly over the tops of the formed breadsticks. This will melt and create a wonderfully gooey, golden crust. Place the baking sheet in your preheated oven. Bake for 20-25 minutes, or until the breadsticks are golden brown around the edges and the cheese on top is melted and bubbly. Keep an eye on them, as oven temperatures can vary. The exact baking time will depend on the thickness of your breadsticks and your oven’s performance. You’re looking for that perfect balance of a slightly crispy exterior and a tender, moist interior.
Cooling and Serving
Once they’re baked to perfection, carefully remove the baking sheet from the oven. Let the cheesy zucchini breadsticks cool on the baking sheet for a few minutes. This allows them to firm up slightly before you attempt to move them. They will be very hot and fragile right out of the oven. Once they’ve cooled slightly, you can carefully transfer them to a wire rack to cool a bit more, or serve them warm directly from the parchment paper. These breadsticks are absolutely delicious served warm, when the cheese is still wonderfully melty and the flavors are at their peak. They pair wonderfully with marinara sauce for dipping, a fresh salad, or as a delightful addition to any meal. Enjoy your homemade, guilt-free, and incredibly tasty Cheesy Zucchini Breadsticks!
Conclusion:
So there you have it! These Cheesy Zucchini Breadsticks are an absolute winner, transforming humble zucchini into a delightfully savory and satisfying treat. They’re incredibly easy to make, requiring minimal prep and pantry staples, making them perfect for a quick weeknight appetizer, a fun side dish for pizza night, or even a creative way to sneak more veggies into your family’s diet. Their cheesy, slightly crisp exterior and tender, flavorful interior are simply irresistible, and the fresh zucchini adds a wonderful lightness that balances the richness of the cheese. I truly encourage you to give this recipe a try; you might just find yourself making them on repeat!
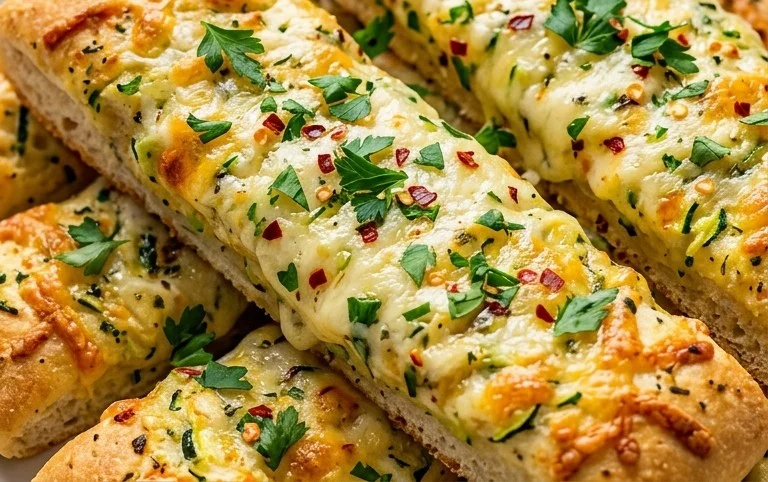
These breadsticks are wonderfully versatile. Serve them warm with your favorite marinara sauce for dipping, alongside a fresh green salad, or as a unique addition to a charcuterie board. For a little twist, consider adding a pinch of red pepper flakes for a touch of heat, or some finely chopped garlic for an extra flavor punch. Don’t be afraid to experiment with different cheeses too – a blend of mozzarella and cheddar, or even some Parmesan, would be delicious.
Frequently Asked Questions about Cheesy Zucchini Breadsticks:
Can I make these ahead of time?
Yes, you absolutely can! You can prepare the batter and store it in an airtight container in the refrigerator for up to 24 hours. When you’re ready to bake, simply spoon the batter into your prepared pan and bake as directed, though you might need to add a few extra minutes to the baking time.
How do I prevent my zucchini breadsticks from getting soggy?
The key to avoiding soggin extractess is to properly drain your shredded zucchini. After shredding, place it in a fine-mesh sieve and gently press out as much excess moisture as possible. Some people even like to wrap it in a clean kitchen towel and give it a good squeeze. This step is crucial for achieving that perfect texture.
Cheesy Zucchini Breadsticks
Delicious and savory breadsticks made with grated zucchini and a blend of cheeses.
Ingredients
-
4 cups grated zucchini (about 2 large zucchini)
-
1 cup finely shredded mozzarella cheese
-
½ cup shredded mozzarella cheese
-
⅓ cup finely shredded Parmesan cheese
-
1 large egg
-
1 teaspoon dried Italian seasoning
-
½ teaspoon salt
-
½ teaspoon garlic powder
Instructions
-
Step 1
Preheat oven to 400°F (200°C). Line a baking sheet with parchment paper. -
Step 2
Squeeze excess moisture from the grated zucchini using a cheesecloth or paper towels. -
Step 3
In a medium bowl, combine the squeezed zucchini, 1 cup finely shredded mozzarella cheese, ½ cup shredded mozzarella cheese, Parmesan cheese, egg, Italian seasoning, salt, and garlic powder. Mix well. -
Step 4
Spoon the mixture onto the prepared baking sheet and spread it out into a rectangle, about 1/2 inch thick. -
Step 5
Bake for 18-20 minutes, or until golden brown and firm. -
Step 6
Let cool slightly, then cut into breadstick shapes.
Important Information
Nutrition Facts (Per Serving)
It is important to consider this information as approximate and not to use it as definitive health advice.
Allergy Information
Please check ingredients for potential allergens and consult a health professional if in doubt.