Chocolate Chip Oreo Cheesecake Bars-Decadent Treat
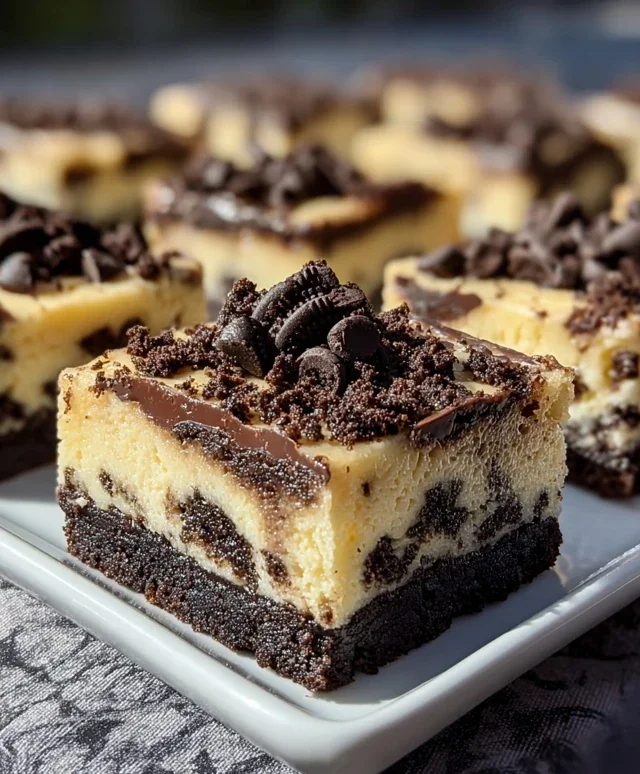
Chocolate Chip Oreo Cheesecake Bars are more than just a dessert; they’re an experience. Imagin extracte the creamy, dreamy texture of classic cheesecake meeting the satisfying crunch and familiar, beloved flavor of Oreos, all elevated by pockets of melty chocolate chips. Is there anything better? I certainly don’t think so! This recipe is for all of us who can’t quite decide between cheesecake and cookies, or perhaps those who simply want to combine two of life’s greatest sweet treats into one perfect bar. We’re talking about a ridiculously decadent base, a silky smooth cheesecake layer studded with chunks of Oreo cookies, and then – the pièce de résistance – a generous scattering of chocolate chips throughout. These Chocolate Chip Oreo Cheesecake Bars are guaranteed to be the star of any gathering, or a delightful indulgence just for yourself. Get ready for pure bliss in every bite!
Chocolate Chip Oreo Cheesecake Bars
Get ready to experience pure bliss with these Chocolate Chip Oreo Cheesecake Bars. This recipe combines the irresistible crunch of Oreo cookies, the creamy tang of cheesecake, and the gooey sweetness of chocolate chips into one decadent bar. They’re perfect for potlucks, parties, or just a special treat for yourself. We’re talking about a layered masterpiece: a buttery Oreo crust, a smooth and luscious cheesecake filling, and a delightful chocolate chip cookie dough topping. Trust me, these bars are a game-changer!
Ingredients:
Instructions:
Let’s break down how to create these amazing bars. It might seem like a few steps, but each one is straightforward and contributes to the final deliciousness.
1. Prepare the Oreo Crust
Start by preheating your oven to 350°F (175°C). Line an 8×8 inch baking pan with parchment paper, leaving an overhang on the sides. This will make it super easy to lift the bars out once they’re baked and cooled. In a medium bowl, combine the Oreo cookie crum extractbs with the 5 tablespoons of melted unsalted butter. Stir until the crum extractbs are evenly moistened. It should resemble wet sand. Press this mixture firmly and evenly into the bottom of the prepared baking pan. I like to use the bottom of a measuring cup or a flat-bottomed glass to get a nice, compact layer. This firm crust is crucial for a good base that won’t crum extractble apart.
2. Make the Creamy Cheesecake Filling
Now, let’s move on to the star of the show: the cheesecake filling. In a large bowl, beat the 16 ounces of softened cream cheese until it’s completely smooth and creamy. Make sure your cream cheese is truly softened – this is key to avoiding lumps. Add the 1/2 cup of granulated sugar and 1 teaspoon of vanilla extract. Beat again until well combined and smooth. Then, one at a time, add the 2 eggs, beating well after each addition. Don’t overmix once the eggs are in; just incorporate them until no streaks of egg remain. Finally, gently fold in the 1/2 cup of sour cream. This addition will make the cheesecake extra rich and tangy. Pour this luscious cheesecake mixture evenly over the prepared Oreo crust.
3. Craft the Chocolate Chip Cookie Dough Topping
This is where things get really exciting! In a separate medium bowl, cream together the 1/2 cup of softened unsalted butter, 1/3 cup of brown sugar, and 1/4 cup of granulated sugar until light and fluffy. You can use an electric mixer for this, or a sturdy whisk and some elbow grease. Stir in 1 teaspoon of vanilla extract. Next, beat in the 1 egg until fully incorporated. In another small bowl, whisk together the 1 1/4 cups of all-purpose flour, 1/2 teaspoon of baking soda, and 1/4 teaspoon of salt. Gradually add the dry ingredients to the wet ingredients, mixing until just combined. Be careful not to overmix the cookie dough, as this can lead to tough bars. The dough will be thick.
4. Assemble and Bake the Bars
Now, it’s time to bring it all together. Dollop spoonfuls of the chocolate chip cookie dough batter over the cheesecake filling. You don’t need to spread it perfectly; a slightly rustic look is part of the charm. Gently spread the cookie dough to cover most of the cheesecake layer. You can use an offset spatula or the back of a spoon. You can even add a few extra chocolate chips on top if you’re feeling extra indulgent! Carefully place the baking pan in the preheated oven. Bake for 35-45 minutes, or until the edges of the cheesecake are set and slightly puffed, and the cookie dough topping is golden brown and cooked through. The center might still jiggle a little, which is perfectly fine.
5. Cool and Cut for Perfect Servings
This is arguably the hardest part: waiting for them to cool! Once baked, remove the pan from the oven and let the bars cool completely in the pan on a wire rack. This cooling process is essential for the cheesecake to set properly. Once they are fully cooled to room temperature, cover the pan tightly with plastic wrap and refrigerate for at least 4 hours, or preferably overnight. Chilling is crucial for the bars to firm up and for the flavors to meld beautifully. When ready to serve, use the parchment paper overhang to lift the entire slab out of the pan. Cut into bars using a sharp knife. Wipe the knife clean between cuts for neat edges. Enjoy these heavenly Chocolate Chip Oreo Cheesecake Bars!
Conclusion:
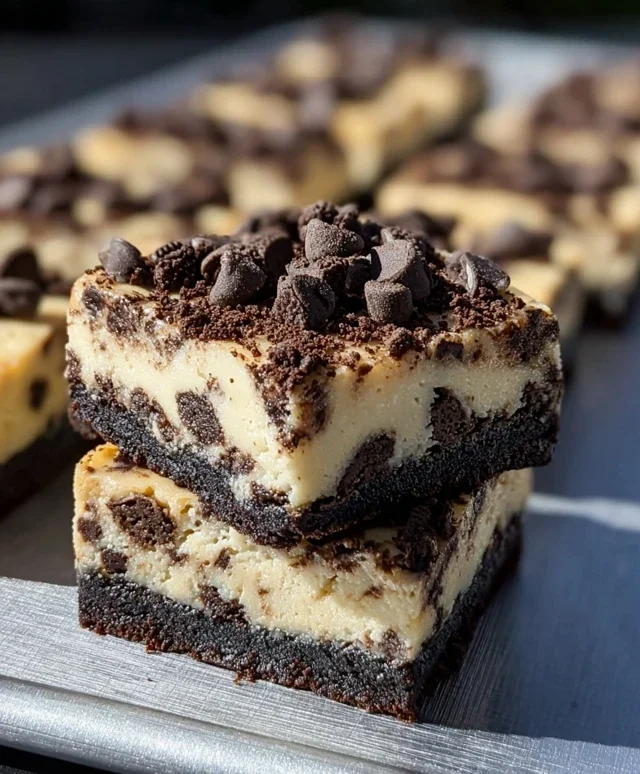
There you have it – the ultimate guide to creating these irresistible Chocolate Chip Oreo Cheesecake Bars! This recipe is a guaranteed crowd-pleaser, perfectly balancing the rich creaminess of cheesecake with the delightful crunch and chocolatey goodness of Oreos and chocolate chips. The buttery Oreo crust provides a fantastic foundation, while the smooth, tangy cheesecake filling is elevated by those classic chocolate chips scattered throughout. They’re incredibly versatile, making them ideal for potlucks, family gatherings, or simply as a special treat to brighten your day.
These bars are wonderful served chilled, allowing the cheesecake to set beautifully. For an extra touch of indulgence, consider topping them with a dollop of whipped cream, a drizzle of chocolate sauce, or even a few extra crum extractbled Oreos. If you’re feeling adventurous, try swapping out the chocolate chips for white chocolate chips, adding a handful of chopped nuts to the filling, or even incorporating a swirl of caramel. I truly encourage you to give these Chocolate Chip Oreo Cheesecake Bars a try; they’re a simple yet incredibly rewarding dessert experience that you won’t regret!
Frequently Asked Questions:
Can I make these bars ahead of time?
Absolutely! These bars are actually best made a day in advance. This allows the cheesecake to fully set and the flavors to meld together beautifully. Store them covered in the refrigerator.
How long do these bars last?
Properly stored in an airtight container in the refrigerator, your Chocolate Chip Oreo Cheesecake Bars should stay delicious for up to 3-4 days.
Can I freeze these bars?
Yes, freezing is a great option! Cut them into individual bars and wrap them tightly in plastic wrap, then in foil. They can be frozen for up to 2 months. Thaw them in the refrigerator overnight before serving.
Chocolate Chip Oreo Cheesecake Bars
Decadent cheesecake bars layered with crushed Oreos and chocolate chips, featuring a buttery Oreo crust and a rich, creamy cheesecake filling topped with a brown sugar crumble.
Ingredients
-
2 cups Oreo cookie crumbs (about 20 Oreos)
-
5 tbsp unsalted butter, melted
-
16 oz cream cheese, softened
-
1/2 cup granulated sugar
-
1 tsp vanilla extract
-
2 eggs
-
1/2 cup sour cream
-
1/2 cup unsalted butter, softened
-
1/3 cup brown sugar
-
1/4 cup granulated sugar
-
1 tsp vanilla extract
-
1 egg
-
1 1/4 cups all-purpose flour
-
1/2 tsp baking soda
-
1/4 tsp salt
Instructions
-
Step 1
Preheat oven to 350°F (175°C). Line an 8×8 inch baking pan with parchment paper, leaving an overhang on the sides. -
Step 2
For the crust: In a medium bowl, combine the Oreo cookie crumbs and 5 tablespoons of melted butter. Press the mixture evenly into the bottom of the prepared baking pan. -
Step 3
For the cheesecake filling: In a large bowl, beat together the softened cream cheese and 1/2 cup granulated sugar until smooth. Beat in 1 teaspoon vanilla extract and 2 eggs, one at a time, until just combined. Stir in the sour cream. -
Step 4
Pour the cheesecake filling over the Oreo crust. Bake for 30-35 minutes, or until the edges are set and the center is slightly jiggly. -
Step 5
For the crumble topping: In a separate bowl, cream together the 1/2 cup softened butter, brown sugar, and 1/4 cup granulated sugar until light and fluffy. Beat in 1 egg and 1 teaspoon vanilla extract. Stir in the flour, baking soda, and salt until just combined. Sprinkle this crumble mixture evenly over the cheesecake filling. -
Step 6
Return the pan to the oven and bake for an additional 15-20 minutes, or until the crumble is golden brown and the cheesecake is fully set. -
Step 7
Let the bars cool completely in the pan on a wire rack. Once cooled, chill in the refrigerator for at least 2 hours, or until firm. Cut into bars and serve.
Important Information
Nutrition Facts (Per Serving)
It is important to consider this information as approximate and not to use it as definitive health advice.
Allergy Information
Please check ingredients for potential allergens and consult a health professional if in doubt.