Dairy Free Pesto Recipe – Deliciously Vegan & Easy
Dairy Free Pesto is a revelation for anyone who adores that vibrant, herbaceous flavor but needs to avoid dairy. Forget everything you thought you knew about pesto; this recipe is about to become your new kitchen staple. We all know and love traditional pesto for its bright, zesty punch, perfect for dressing pasta, slathering on sandwiches, or dipping crusty bread. But what if you’re lactose intolerant, following a vegan diet, or simply looking for a lighter option? That’s where this incredible dairy free pesto shines. It delivers all the aromatic goodness of basil, the nutty depth of pine nuts, the zing of garlic, and the tang of lemon, all without a hint of cheese. What makes this particular dairy free pesto so special is its incredible versatility and how effortlessly it captures that authentic pesto essence. It’s proof that delicious food doesn’t need to compromise on dietary needs or preferences. Get ready to fall in love with pesto all over again!
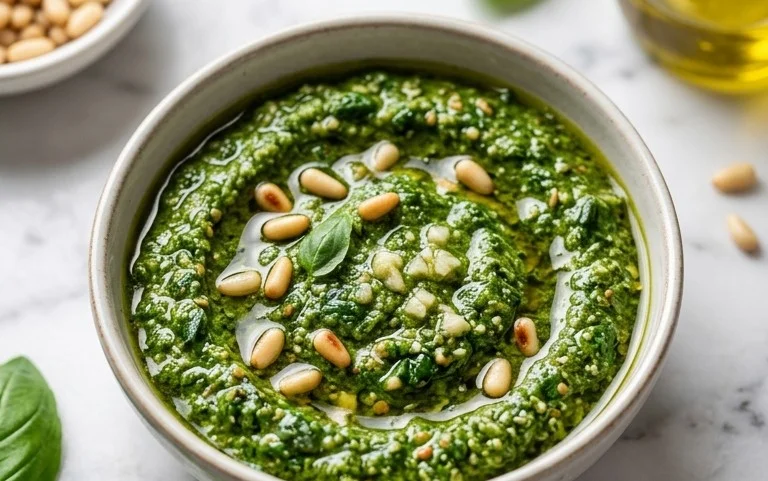
Dairy Free Pesto
There’s something incredibly vibrant and satisfying about homemade pesto. The fresh herbaceousness of basil, the subtle nuttiness, and that zesty bite – it’s a flavor explosion that can elevate so many dishes. Traditionally, pesto relies on Parmesan cheese for its creamy texture and salty umami. However, for those of us navigating a dairy-free lifestyle, or simply looking for a lighter option, this dairy-free pesto recipe is an absolute game-changer. It captures all the essence of classic pesto without a drop of dairy, proving that you don’t need cheese to achieve that iconic taste. This recipe is incredibly simple to whip up, making it a perfect weeknight addition or a fantastic make-ahead condiment for all your culinary adventures. Imagin extracte slathering it on toasted bread, tossing it with pasta, dolloping it onto grilled vegetables, or even swirling it into soups. The possibilities are truly endless!
Ingredients:
Crafting Your Dairy Free Pesto
Creating this delicious dairy-free pesto is a straightforward process, perfect for even begin extractner cooks. The key is using the freshest ingredients you can find to really let those beautiful flavors shine. We’ll be combining everything in a food processor or blender, which makes for a quick and easy assembly. The slight variation in nuts allows for personalization; while pine nuts are traditional and offer a delicate sweetness, walnuts provide a richer, earthier depth, and pumpkin seeds are a fantastic nut-free alternative that still delivers a lovely texture and flavor.
Step-by-Step Instructions
1. Prepare Your Basil: Begin extract by washing your basil leaves thoroughly and patting them completely dry with paper towels. It’s crucial that the basil is dry; any excess water can lead to a watery pesto and can also affect its shelf life. You want those vibrant green leaves to be the star of the show, so give them a good shake and a gentle pat. Discard any bruised or discolored leaves. You’ll be amazed at how much basil you need for three cups – it wilts down significantly when processed.
2. Toast Your Nuts (Optional but Recommended): For an even more intense and nuanced flavor, I highly recommend lightly toasting your pine nuts (or your chosen alternative). Place the nuts in a dry skillet over medium-low heat. Stir them frequently, watching closely as they begin extract to turn a light golden brown and release their aroma. This usually takes about 3-5 minutes. Be very careful not to burn them, as burnt nuts can impart a bitter taste to your pesto. Once toasted, immediately remove them from the skillet to stop the cooking process and let them cool completely. This step adds a wonderful depth that truly elevates the pesto.
3. Combine the Dry Ingredients and Aromatics: In the bowl of your food processor (or blender), add the toasted (and cooled) pine nuts, the peeled garlic cloves, and the salt. Give these ingredients a quick pulse to break them down slightly. This initial pulsing helps to create a good base before adding the softer ingredients. If you’re using nutritional yeast, add it at this stage as well. Nutritional yeast is a deactivated yeast that has a cheesy, nutty, and savory flavor profile, making it an excellent dairy-free substitute for the umami typically provided by Parmesan.
4. Add the Basil and Lemon: Now, add the packed basil leaves to the food processor. Don’t be alarmed if it looks like too much basil; it will quickly reduce in volume as you process. Squeeze in the juice from half a lemon. The lemon juice not only adds a bright, zesty tang but also helps to preserve the vibrant green color of the pesto. It’s a crucial element for achieving that fresh, lively flavor. Pulse the mixture several times until the basil is roughly chopped and the ingredients are well combined.
5. Emulsify with Olive Oil: With the food processor running on low speed, slowly drizzle in the extra virgin extract olive oil through the feed tube. Continue to process until the pesto reaches your desired consistency. You’re looking for a creamy, slightly coarse texture, not a completely smooth paste. If you prefer a thinner pesto, you can add a little more olive oil, a tablespoon at a time, until you achieve your perfect consistency. Taste the pesto and adjust seasoning if necessary, adding a pinch more salt or a squeeze of lemon juice if desired.
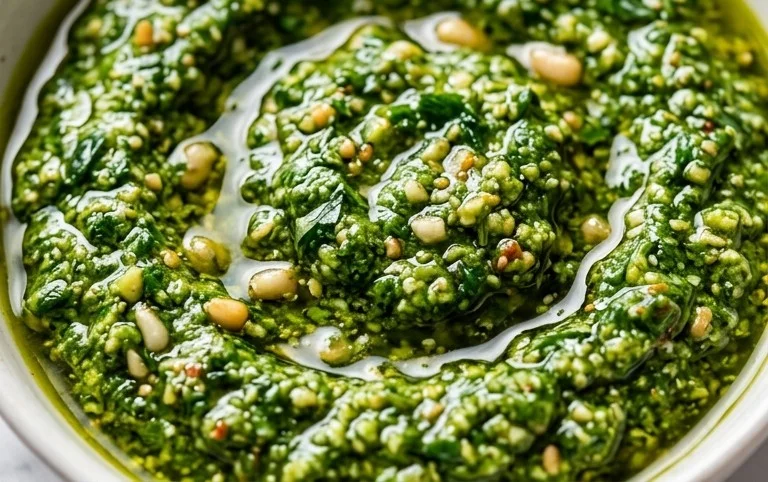
Once your dairy-free pesto is ready, transfer it to an airtight container. You can store it in the refrigerator for up to a week. For longer storage, consider pouring a thin layer of olive oil over the top to prevent oxidation and freezing it in ice cube trays for convenient, pre-portioned servings. Enjoy your delicious homemade creation!
Conclusion:
I hope you’re as excited as I am to try this delicious dairy-free pesto recipe! It’s a fantastic way to enjoy the vibrant, fresh flavors of traditional pesto without any dairy. The combination of basil, garlic, pine nuts, and olive oil creates a wonderfully aromatic and satisfying sauce that’s incredibly versatile. Whether you’re looking for a healthier alternative or have dietary restrictions, this recipe proves that you don’t need cheese to achieve incredible taste. It’s perfect for pasta dishes, spreading on sandwiches, drizzling over roasted vegetables, or even as a dip. Don’t be afraid to experiment with different nuts like walnuts or almonds, or add a touch of lemon zest for an extra zing. Give this dairy-free pesto a whirl; I’m confident you’ll love how easy it is to make and how delicious it tastes!
Frequently Asked Questions:
Q: Can I freeze this dairy-free pesto?
A: Absolutely! This dairy-free pesto freezes beautifully. Once it’s made, you can portion it into ice cube trays, freeze until solid, and then transfer the pesto cubes to an airtight container or freezer bag. This way, you can easily thaw out just the amount you need for your next meal.
Q: What nuts can I use instead of pine nuts?
A: Pine nuts can be a bit pricey, so feel free to substitute them with other nuts! Toasted walnuts or blanched almonds are excellent choices that offer a similar texture and flavor profile. You could also try pistachios for a slightly different, vibrant twist.
Q: How long does this pesto last in the refrigerator?
A: Stored in an airtight container in the refrigerator, this dairy-free pesto should stay fresh for about 5-7 days. Covering the surface of the pesto with a thin layer of olive oil can help to further preserve its freshness and prevent browning.
Dairy Free Pesto
A vibrant and flavorful dairy-free pesto, perfect for pasta, sandwiches, and more.
Ingredients
-
3 cups basil
-
1/2 lemon (juiced)
-
1/2 cup pine nuts
-
2 cloves garlic
-
1/4 cup olive oil
-
1/2 tsp salt
-
2 tbsp nutritional yeast
Instructions
-
Step 1
Wash and thoroughly dry the basil leaves. -
Step 2
In a food processor, combine the basil, pine nuts, garlic, and salt. -
Step 3
Pulse until the ingredients are coarsely chopped. -
Step 4
With the food processor running, slowly drizzle in the olive oil until the pesto is smooth but still has some texture. -
Step 5
Add the lemon juice and nutritional yeast (if using) and pulse a few more times to combine. -
Step 6
Taste and adjust seasoning if necessary.
Important Information
Nutrition Facts (Per Serving)
It is important to consider this information as approximate and not to use it as definitive health advice.
Allergy Information
Please check ingredients for potential allergens and consult a health professional if in doubt.