Easy Homemade Fruit Leather Recipe – Delicious & Healthy
Homemade Fruit Leather Recipe: Get ready to unleash your inner kitchen alchemist! There’s something incredibly satisfying about transforming simple, ripe fruit into vibrant, chewy strips of pure sunshine. Who doesn’t love fruit leather? It’s the ultimate nostalgic treat, a healthier alternative to processed snacks, and a fantastic way to preserve the bounty of seasonal produce. Unlike store-bought versions that can sometimes be overly sweet or have a plastic-like texture, this homemade fruit leather recipe puts you in control of the flavor and consistency. Imagin extracte biting into a tangy strawberry leather, a sweet mango delight, or a mixed berry explosion – all made with just a few ingredients and a little bit of patience. It’s a project that’s as fun to make with kids as it is to devour yourself.
Homemade Fruit Leather Recipe
There’s something incredibly satisfying about making your own fruit leather. It’s a fantastic way to preserve the natural sweetness and vibrant flavors of fresh fruit, and it results in a chewy, tangy, and utterly delicious snack that’s miles ahead of anything store-bought. Plus, it’s surprisingly simple to make at home, requiring minimal ingredients and just a bit of patience. This recipe is incredibly versatile; you can use pretty much any fruit you have on hand, from the usual suspects like strawberries and apples to more adventurous combinations like mango and raspberry, or even a blend of stone fruits.
The magic of fruit leather lies in its concentrated flavor. By drying out the fruit, you intensify its natural sugars and create a chewy texture that’s perfect for snacking, packing in lunches, or even using as a creative garnish for desserts. It’s a healthy alternative to processed candies, and you have complete control over the sweetness and ingredients. Imagin extracte the joy of pulling a sheet of your own homemade fruit leather from the oven – it’s a little taste of sunshine!
Ingredients:
This recipe is designed to be a starting point. The “2 cups fruit, chopped” is your canvas. I love using a mix of fruits for a more complex flavor profile. For example, a cup of sweet strawberries paired with a cup of tart raspberries creates a wonderful balance. If you’re using firmer fruits like apples or pears, make sure to chop them into relatively small, uniform pieces so they cook down evenly. For softer fruits like berries, you can be a little less precise with the chopping. The sugar is there to enhance the sweetness and help with the preservation process, but you can adjust this amount based on the sweetness of your fruit and your personal preference. A little less sugar is always an option if you prefer a tarter fruit leather. The lemon juice is crucial for adding a bright, zesty note that cuts through the sweetness and helps to prevent the fruit from browning, especially if you’re using apples or pears.
Cooking Instructions
Here’s how to transform your fresh fruit into delicious, chewy fruit leather:
1. Prepare the Fruit and Puree: Start by washing and chopping your chosen fruit into manageable pieces. If you’re using fruits with large pits or cores, remove those first. Place the chopped fruit into a blender or food processor. Add the white sugar and the juice of half a lemon to the blender. Blend everything until you have a smooth, lump-free puree. If your fruit is particularly fibrous or you prefer an extra-smooth texture, you can push the puree through a fine-mesh sieve at this stage, but this is entirely optional. The consistency should be similar to applesauce or a thick smoothie.
2. Preheat and Prepare Baking Sheet: Preheat your oven to its lowest setting, typically around 170-200 degrees Fahrenheit (75-95 degrees Celsius). This low temperature is essential for drying out the fruit without actually cooking it, which would result in a different texture and potentially burn the sugars. Line a baking sheet with parchment paper or a silicone baking mat. Ensure the parchment paper or mat completely covers the surface of the baking sheet, as this will prevent the fruit leather from sticking and make it easy to peel off once it’s done.
3. Spread the Puree: Pour the fruit puree onto the prepared baking sheet. Using a spatula or the back of a spoon, spread the puree into a thin, even layer. Aim for a thickness of about ¼ inch (about 0.5 cm). It’s crucial to have an even layer so that the fruit leather dries uniformly. If some areas are thicker than others, they will take longer to dry, leading to an inconsistent texture. You want to spread it as close to the edges of the parchment paper as possible, but be mindful not to let it drip over the sides.
4. Drying in the Oven: Place the baking sheet in the preheated oven. The drying time can vary significantly depending on your oven, the thickness of your puree, and the moisture content of your fruit. It typically takes anywhere from 4 to 8 hours. It’s important to check on the fruit leather periodically, perhaps every hour or two, especially in the later stages. You’re looking for a texture that is no longer sticky to the touch and peels away cleanly from the parchment paper. The edges should be slightly firm, but the center should still be pliable. A good test is to gently touch the surface; if your finger doesn’t leave an indentation and the leather doesn’t stick, it’s likely ready.
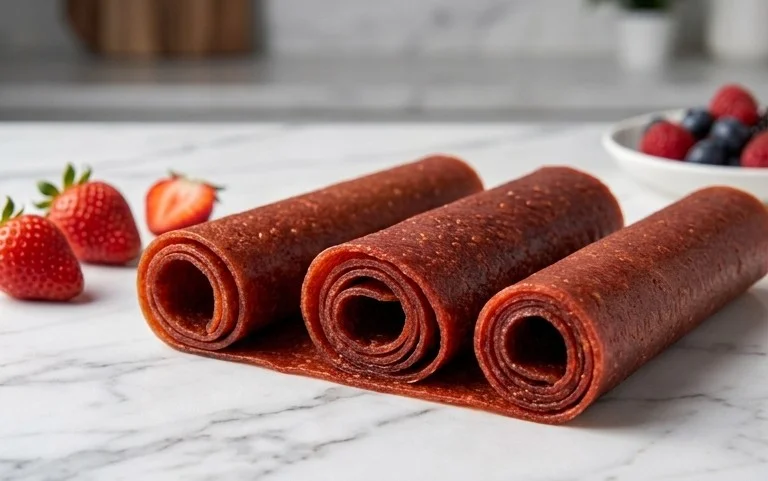
5. Cooling and Cutting: Once the fruit leather has reached the desired consistency, carefully remove the baking sheet from the oven. Let the fruit leather cool completely on the baking sheet. This cooling process is just as important as the drying, as it allows the leather to firm up. Once completely cool, you can peel the fruit leather off the parchment paper. For storage or serving, you can cut the fruit leather into strips, squares, or fun shapes using a pizza cutter or a sharp knife. If you plan on storing it for longer periods, rolling the cut pieces into logs and wrapping them individually in plastic wrap or parchment paper is a great way to keep them fresh and prevent them from sticking together. Enjoy your homemade, healthy, and utterly delicious fruit leather!

Conclusion:
And there you have it – a simple, delicious, and incredibly satisfying way to create your own homemade fruit leather recipe! This recipe is fantastic because it allows you to control exactly what goes into your snacks, avoiding all those unnecessary preservatives and added sugars found in store-bought versions. Plus, the process is so rewarding, transforming fresh fruit into a chewy, flavorful treat that kids and adults alike will adore. Whether you’re looking for a healthy lunchbox addition, a guilt-free dessert, or a fun activity to do with the family, this fruit leather is a winner.
I love serving my homemade fruit leather cut into fun shapes for parties, or simply rolled up for an on-the-go snack. Get creative with your fruit choices! Strawberry and apple is a classic, but why not try a vibrant mango and passionfruit combination, or a tart raspberry and blueberry blend? Don’t be afraid to experiment with spices like cinnamon or a hint of gin extractger for an extra layer of flavor.
I truly encourage you to give this homemade fruit leather recipe a try. It’s easier than you think, and the results are so worth it. You’ll be amazed at how delicious and customizable your own fruit creations can be!
Frequently Asked Questions:
What fruits work best for homemade fruit leather?
Almost any fruit with a good amount of natural pectin and moisture will work! Berries (strawberries, raspberries, blueberries), stone fruits (peaches, plums, apricots), apples, pears, and tropical fruits like mango and pineapple are excellent choices. You can also combine different fruits for unique flavor profiles.
How long does homemade fruit leather last?
When stored properly in an airtight container at room temperature, your homemade fruit leather can last for about 1 to 2 weeks. For longer storage, you can wrap individual pieces tightly and freeze them for up to a few months.
Can I make fruit leather without added sugar?
Absolutely! The sweetness of the fruit itself is often enough. If your fruit is particularly tart, you can add a small amount of natural sweetener like honey, maple syrup, or agave nectar, but always taste your fruit puree before adding any. The goal is to let the fruit’s natural flavors shine!
Homemade Fruit Leather
A simple and delicious way to make homemade fruit leather using fresh fruit.
Ingredients
-
2 cups fruit, chopped
-
3 tbsp white sugar
-
½ whole lemon, just the juice
-
1 cup apple slices, peeled and cored
-
½ cup strawberries, hulled
-
¼ cup blueberries
Instructions
-
Step 1
Combine fruit, sugar, and lemon juice in a saucepan. -
Step 2
Cook over medium heat until fruit is soft and tender, about 10-15 minutes. -
Step 3
Mash the fruit mixture with a fork or immersion blender until smooth. -
Step 4
Pour the mixture onto a baking sheet lined with parchment paper or a silicone baking mat. -
Step 5
Spread evenly into a thin layer. -
Step 6
Bake in a preheated oven at 170°F (77°C) for 4-6 hours, or until the fruit leather is no longer sticky. -
Step 7
Let cool completely before cutting into strips.
Important Information
Nutrition Facts (Per Serving)
It is important to consider this information as approximate and not to use it as definitive health advice.
Allergy Information
Please check ingredients for potential allergens and consult a health professional if in doubt.