Easy Roasted Summer Squash Recipe-Flavorful Side
Roasted Summer Squash is one of those simple pleasures that truly embodies the essence of summer. There’s a reason why this dish becomes a staple when those vibrant squash varieties hit their peak. It’s incredibly easy to prepare, requiring minimal effort for maximum flavor payoff, which is a lifesaver during those busy warm-weather days. What makes roasted summer squash so special? It’s the transformative magic of the oven. The high heat caramelizes the natural sugars within the squash, turning tender, slightly sweet flesh into something deeply satisfying with a delightful chew. Gone are the days of bland, watery squash; roasting unlocks a depth of flavor and a pleasing texture that is simply addictive. It’s the perfect side dish to almost any grilled protein or a star in its own right when tossed with fresh herbs and a squeeze of lemon. I can’t wait for you to experience this delicious simplicity.
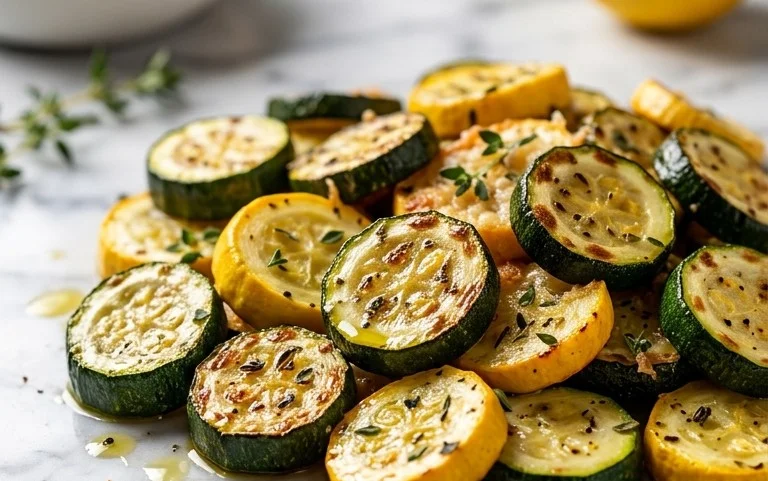
Roasted Summer Squash
There’s something truly magical about summer produce, and summer squash is high on my list of favorites. Its delicate flavor and tender texture make it incredibly versatile, but when roasted, it transforms into something truly special. The edges get beautifully caramelized, the natural sweetness intensifies, and it develops a satisfying chew that’s simply irresistible. Forget bland, steamed squash; this roasted version is a flavor explosion and a testament to how simple ingredients, with a little heat, can create culinary fireworks. This recipe is my go-to for a quick, healthy, and incredibly delicious side dish that pairs perfectly with almost anything, from grilled chicken to flaky fish, or even just enjoyed on its own.
Ingredients:
Cooking Instructions:
My approach to roasted summer squash is all about maximizing flavor and achieving that perfect tender-crisp texture. It’s a straightforward process, but a few key steps ensure a spectacular outcome.
1. Prepare the Squash: The Foundation of Flavor
The first step is to get our star ingredient, the summer squash, ready for its transformation. You’ll want to select about a pound of summer squash, which usually translates to around two medium-sized zucchini or yellow squash, or a delightful mix of both. For this recipe, I prefer to use squash that isn’t too watery, so look for firm specimens. To prepare them, give them a good wash under cool running water. Then, trim off the stem and blossom ends. For roasting, I find cutting the squash into uniform pieces is key for even cooking. I usually slice them into ½-inch thick rounds or half-moons, depending on the shape of the squash. If you’re using larger squash, you might want to cut them into quarter-moons to ensure they cook through without becoming mushy. Consistency in size is paramount here; it prevents some pieces from burning while others remain undercooked.
2. Seasoning the Squash: Building the Flavor Profile
Once the squash is prepped and ready, it’s time to get it seasoned. This is where the magic really begin extracts to unfold. In a medium-sized bowl, I place all the prepared squash pieces. Then, I drizzle in the 1 tablespoon of good quality olive oil. The oil acts as a conductor for all the other flavors, helping them adhere to the squash and promoting that beautiful browning during roasting. Next, I add my dry seasonings. The 1 teaspoon of lemon pepper seasoning provides a bright, zesty kick that complements the squash wonderfully. The ½ teaspoon of paprika adds a subtle smokiness and a gorgeous reddish hue. And of course, the ½ teaspoon of kosher salt (or to taste) is essential for enhancing all the natural flavors. I like to use kosher salt because its larger flakes dissolve nicely and provide a more pleasant texture than fine table salt. Give everything a good toss with your hands or a sturdy spatula, ensuring each piece of squash is evenly coated with the oil and seasonings. Don’t be shy here; you want every surface to have a chance to absorb these delicious flavors.
3. The Crispy Topping: Adding Texture and Umami
This is a step that truly elevates roasted summer squash from good to absolutely fantastic. I whisk together the 2 tablespoons of grated Parmesan cheese and the 1 tablespoon of Panko breadcrum extractbs in a separate small bowl. Panko breadcrum extractbs are a game-changer because they are larger and lighter than regular breadcrum extractbs, creating an exceptionally crispy and golden topping when baked. The Parmesan cheese adds a salty, nutty depth of flavor that pairs beautifully with the squash and the breadcrum extractbs. I find that if I add the cheese and breadcrum extractbs too early, they can sometimes get a little soggy during the initial roasting phase. So, I hold off on this mixture until the very last few minutes of cooking. This way, they achieve a perfect crispness without burning.
4. Roasting to Perfection: Achieving Tender-Crisp Delight
Now for the main event – the roasting. Preheat your oven to a hot 400 degrees Fahrenheit (200 degrees Celsius). A hot oven is crucial for achieving that desirable caramelization and tender-crisp texture. Line a large baking sheet with parchment paper. This is a helpful tip for easy cleanup and also prevents the squash from sticking to the pan. Spread the seasoned squash in a single layer on the prepared baking sheet. It’s important not to overcrowd the pan. If you have too much squash, use two baking sheets. Overcrowding will cause the squash to steam rather than roast, and we’re after those beautifully browned edges! Roast the squash for about 15-20 minutes. You’ll want to check on it periodically, giving the baking sheet a gentle shake or using tongs to flip the pieces for even browning.
5. The Final Flourish: Crisping and Serving
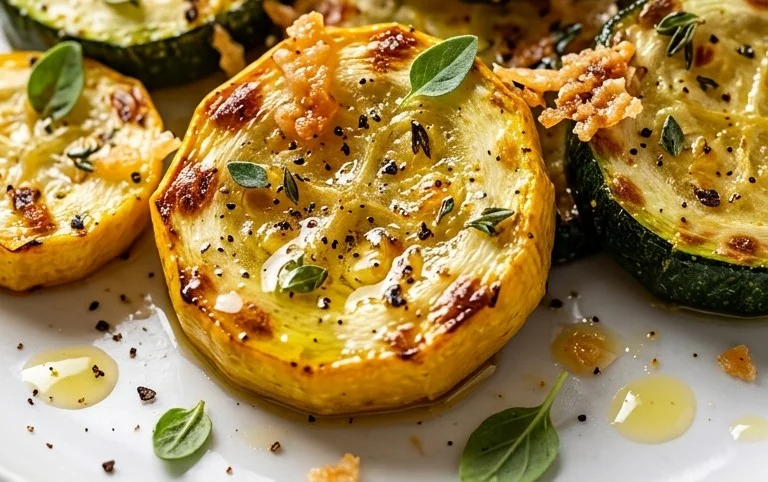
After about 15-20 minutes, or when the squash is starting to become tender and you see some nice browning on the edges, it’s time to add our crispy topping. Carefully remove the baking sheet from the oven. Evenly sprinkle the Parmesan and Panko mixture over the roasted squash. Return the baking sheet to the oven for another 5-7 minutes, or until the breadcrum extractbs are golden brown and crispy, and the cheese is melted and slightly bubbly. Keep a close eye on it during this final stage, as the Panko can go from perfectly golden to burnt very quickly. Once it’s ready, remove it from the oven. You can give it a final taste and adjust the salt if needed. Let it cool for just a minute or two before serving. This roasted summer squash is best enjoyed warm, straight from the oven, allowing you to experience its full textural and flavor potential. It’s a simple yet incredibly satisfying dish that showcases the best of summer produce.
Conclusion:
There you have it – a simple, yet incredibly delicious way to highlight the best of summer produce! This roasted summer squash recipe is a true winner because it’s unbelievably easy to prepare, requires minimal ingredients, and the roasting process brings out a wonderful sweetness and slightly caramelized texture that plain sautéed squash just can’t match. It’s the perfect side dish that pairs beautifully with grilled meats, fish, or can even be the star of a light vegetarian meal. I truly encourage you to give this recipe a try; it’s become a staple in my kitchen during the warmer months, and I think you’ll find it just as satisfying.
Feel free to get creative with your herbs and spices! A sprinkle of red pepper flakes for a touch of heat, or some fresh dill or mint stirred in after roasting can add delightful new dimensions. The possibilities are nearly endless, making it a versatile addition to any summer menu. Don’t hesitate to experiment and find your perfect flavor profile.
Frequently Asked Questions:
What kind of summer squash works best for roasting?
Most common varieties like zucchini and yellow squash are fantastic for roasting. You can also use crookneck or pattypan squash. The key is to cut them into roughly equal-sized pieces so they cook evenly.
Can I roast other vegetables along with the squash?
Absolutely! This recipe is incredibly forgiving. Feel free to add cherry tomatoes, bell peppers, red onion wedges, or even chunks of sweet potato or potato. Just be mindful of cooking times, adding denser vegetables a little earlier if needed.
How do I prevent my roasted summer squash from becoming mushy?
The trick to avoiding mushy roasted summer squash is to ensure your oven is hot enough (around 400°F or 200°C) and to avoid overcrowding the baking sheet. Give the squash pieces plenty of space so they can roast and caramelize rather than steam.
Roasted Summer Squash
A simple and flavorful side dish of roasted summer squash seasoned with Parmesan, Panko, lemon pepper, paprika, and salt.
Ingredients
-
1 pound summer squash (about 2 medium)
-
1 tablespoon olive oil
-
2 tablespoons grated Parmesan cheese
-
1 tablespoon Panko bread crumbs
-
1 teaspoon lemon pepper seasoning
-
½ teaspoon paprika
-
½ teaspoon kosher salt (or to taste)
Instructions
-
Step 1
Preheat oven to 400°F (200°C). -
Step 2
Wash and trim the ends of the summer squash. Cut the squash into 1/2-inch thick rounds or half-moons. -
Step 3
In a medium bowl, toss the squash with olive oil, lemon pepper seasoning, paprika, and kosher salt until evenly coated. -
Step 4
Spread the seasoned squash in a single layer on a baking sheet. -
Step 5
Roast for 15 minutes. -
Step 6
Remove the baking sheet from the oven, sprinkle the Parmesan cheese and Panko bread crumbs over the squash. -
Step 7
Return to the oven and roast for another 5-10 minutes, or until the squash is tender and the topping is golden brown.
Important Information
Nutrition Facts (Per Serving)
It is important to consider this information as approximate and not to use it as definitive health advice.
Allergy Information
Please check ingredients for potential allergens and consult a health professional if in doubt.