Perfect Grilled Pizza Recipe – Easy & Delicious
How to Make the Perfect Grilled Pizza is an art form, a culinary adventure that transforms your backyard into a gourmet pizzeria. Forget soggy crusts and unevenly cooked toppings; we’re diving deep into the secrets of achieving that coveted smoky char, delightful chew, and crispy base that only comes from the grill. There’s something undeniably magical about a grilled pizza. It’s the way the intense heat kisses the dough, creating an irresistible combination of textures and a flavor profile that’s simply unmatched by any oven. Whether you’re hosting a summer barbecue, enjoying a cozy evening outdoors, or simply craving a truly spectacular meal, mastering the art of the perfect grilled pizza will elevate your cooking game and delight everyone at your table. Get ready to impress yourself and your loved ones with this incredible method.
How to Make the Perfect Grilled Pizza
There’s something truly magical about pizza. And when you take that beloved dish and introduce it to the smoky, char-kissed flavor of the grill, you unlock a whole new level of deliciousness. Forget soggy crusts and unevenly cooked toppings. Making the perfect grilled pizza is surprisingly simple, and the results are undeniably impressive. This method ensures a crispy, slightly chewy crust with beautifully melted cheese and perfectly cooked toppings. So, fire up your grill, gather your ingredients, and let’s get ready to create some pizza perfection!
Ingredients:
Preparing Your Dough
The foundation of any great pizza is its dough. For grilled pizza, I prefer a slightly chewier dough that can hold up to the heat of the grill. If you’re using store-bought dough, let it come to room temperature for at least 30 minutes before you start. This makes it much easier to stretch and prevents it from snapping back. If you’re making your own, ensure it’s had a good rise. Once it’s at room temperature, gently stretch or roll out the dough into your desired pizza shape. I usually aim for a roughly 12-inch circle, but an oval or even a rustic freeform shape works beautifully. Avoid making it too thin, as it might burn too quickly on the grill. Dust your work surface and your hands with a little cornmeal or flour to prevent sticking.
Prepping Your Grill
This is where the magic happens! You want a hot grill for grilled pizza, but not so hot that it incinerates your crust before the toppings are cooked. Aim for a medium-high heat, around 400-450 degrees Fahrenheit (200-230 degrees Celsius). If you have a two-zone heating setup on your grill (one side hotter than the other), this is ideal. You’ll use the hotter side for cooking the dough and the cooler side for finishing the pizza. Clean your grill grates thoroughly to prevent sticking and to ensure a clean char.
Cooking the Crust
This is perhaps the most crucial step for achieving that perfect grilled texture.
1. First Grill of the Dough: Lightly brush one side of your stretched pizza dough with olive oil. Carefully place the dough, oiled-side down, directly onto the preheated grill grates. Close the lid and let it cook for 2-4 minutes. You’re looking for nice grill marks and a dough that’s firm enough to handle. Keep a close eye on it; the time will vary depending on your grill’s heat. The goal is to get a beautiful char and a crust that’s cooked on one side.
2. Flipping and Oiling: Using a wide spatula or pizza peel, carefully flip the dough over. Now, brush the grilled side with a thin layer of olive oil. This second oiling helps prevent the dough from sticking to the grates on the other side and adds another layer of flavor.
3. Saucing and Topping: Quickly spread your pizza sauce evenly over the grilled side of the dough, leaving a small border for the crust. Then, sprinkle your shredded mozzarella cheese generously over the sauce. Add your chosen toppings. Work efficiently here, as the grill is still hot! If you’re using delicate toppings or ones that require more cooking time, like raw mushrooms or onions, you can pre-cook them slightly on the cooler side of the grill while the dough is on the hotter side.
Finishing Your Masterpiece
Now it’s time to bring it all together and ensure everything is perfectly cooked.
4. The Cooked Side Finish: Carefully slide the pizza, topping-side down, onto the cooler zone of your grill. If you don’t have a two-zone setup, you’ll need to reduce the heat of your grill to medium-low. Close the lid and let the pizza cook for another 5-8 minutes. This is where the cheese will melt beautifully, and the bottom crust will continue to cook and become wonderfully crispy without burning the toppings. Peek underneath occasionally to ensure the crust is golden brown and not scorching.
5. The Final Touch: Once the cheese is melted and bubbly and the crust is golden and crisp, carefully slide the pizza off the grill using your spatula or pizza peel. Let it rest for a minute or two before slicing. This allows the cheese to set slightly and makes for cleaner slices. Garnish with fresh basil leaves if you like.
Enjoy the incredible flavor of your homemade grilled pizza! The smoky notes from the grill, the crispy yet chewy crust, and the perfectly melted toppings are a combination that’s hard to beat. It’s a fantastic way to entertain, a fun family activity, and an undeniably delicious meal.
Conclusion:
You’ve now learned the secrets to creating truly spectacular grilled pizza! The beauty of this method lies in its simplicity and the incredible flavor infusion you get from the grill. Achieving that perfect crispy, slightly charred crust with a wonderfully melted topping is entirely within your reach. This recipe is fantastic because it elevates homemade pizza to a whole new level, turning a casual meal into a gourmet experience right in your backyard. Imagin extracte the delighted faces of your family and friends as they savor these delicious creations!
To serve, consider a light, crisp salad tossed with a vinaigrette to balance the richness of the pizza. For variations, don’t be afraid to experiment! Try a white pizza with ricotta, garlic, and spinach, or go bold with spicy sausage and roasted red peppers. A barbecue chicken pizza is another crowd-pleaser. The possibilities are endless, limited only by your imagin extractation. So, gather your ingredients, fire up the grill, and dive into making your own perfect grilled pizza. I encourage you to try it – you won’t be disappointed!
Frequently Asked Questions:
Can I make the pizza dough ahead of time?
Absolutely! Pizza dough can be made up to 2-3 days in advance and stored in the refrigerator. Just allow it to come to room temperature for about 30-60 minutes before shaping and grilling.
What kind of grill temperature should I aim for?
You’ll want a medium-high heat on your grill, around 450-500°F (230-260°C). This is hot enough to quickly cook the dough and melt the cheese without burning the crust too quickly.
What if my pizza dough sticks to the grill?
Ensure your grill grates are clean and well-oiled. Also, don’t try to move the pizza too soon. Let it cook for a few minutes until it releases easily from the grates. A good dusting of cornmeal or semolina on the dough can also help prevent sticking.
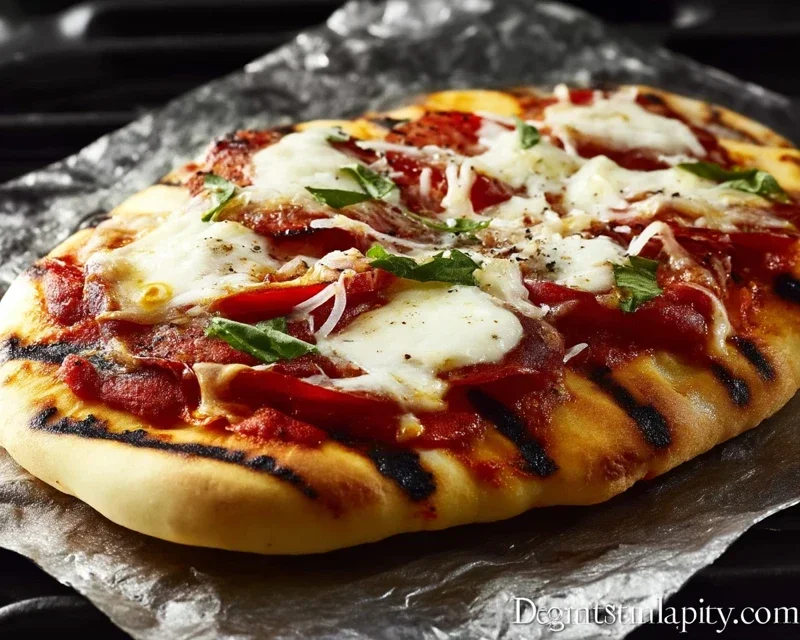
The Perfect Grilled Pizza
Master the art of grilling pizza for a smoky, crispy, and delicious meal. This recipe focuses on achieving a perfect crust and balanced toppings.
Ingredients
-
1 pound pizza dough
-
1/2 cup tomato sauce
-
8 ounces shredded mozzarella cheese
-
1/4 cup sliced pepperoni
-
1/4 cup sliced mushrooms
-
2 tablespoons olive oil
-
1 teaspoon dried oregano
-
Pinch of red pepper flakes
Instructions
-
Step 1
Preheat your grill to medium-high heat (around 450-500°F or 230-260°C). Ensure the grates are clean. -
Step 2
Stretch or roll out the pizza dough to your desired thickness and shape. Lightly brush both sides of the dough with olive oil. -
Step 3
Carefully place the dough directly onto the preheated grill grates. Grill for 2-4 minutes per side, until golden brown and slightly puffed. -
Step 4
Remove the grilled dough from the grill and place it on a clean surface. Spread the tomato sauce evenly over the grilled side, leaving a small border for the crust. -
Step 5
Sprinkle the mozzarella cheese over the sauce, then add the pepperoni, mushrooms, oregano, and red pepper flakes. Drizzle with a little more olive oil if desired. -
Step 6
Carefully transfer the topped pizza back onto the grill. Close the lid and cook for another 5-8 minutes, or until the cheese is melted and bubbly and the crust is fully cooked. -
Step 7
Remove from grill, let rest for a minute, slice, and serve immediately.
Important Information
Nutrition Facts (Per Serving)
It is important to consider this information as approximate and not to use it as definitive health advice.
Allergy Information
Please check ingredients for potential allergens and consult a health professional if in doubt.