Easy Mini Apple Pies – Quick & Delicious Dessert
Mini Apple Pies are the epitome of fall comfort, aren’t they? There’s something undeniably charming and utterly delicious about a perfectly portioned apple pie, baked to golden perfection with a flaky crust and a warm, spiced apple filling. I absolutely adore making these little treasures, and I know you will too. They’re not just a dessert; they’re a hug in edible form. People love mini apple pies because they offer all the classic, nostalgic flavors of a traditional pie, but in a more manageable, individual serving. No more wrestling with a giant pie to get that perfect slice! What truly makes these mini apple pies special is their versatility and how they make every occasion feel a little more festive. Imagin extracte serving these at a party, as a sweet ending to a family dinner, or even just as a delightful afternoon treat. They’re simple enough for a begin extractner baker, yet impressive enough to wow anyone.
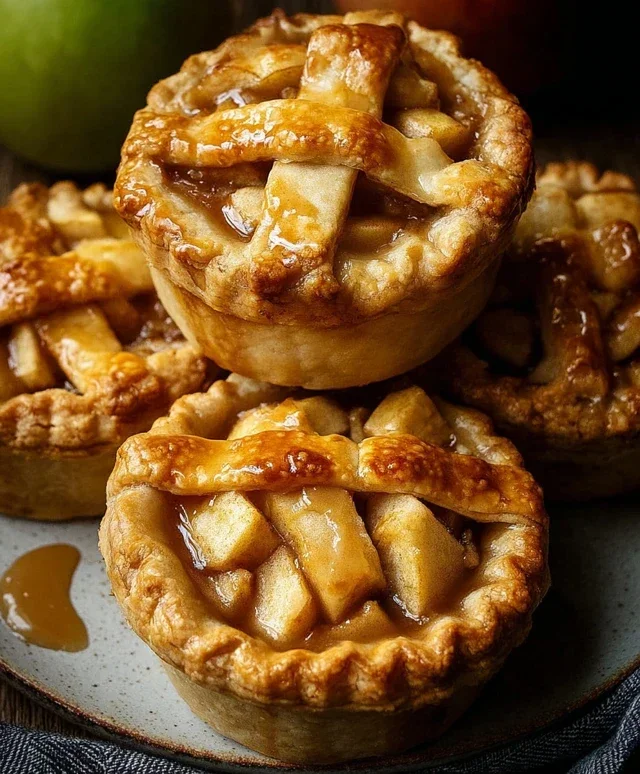
Mini Apple Pies
There’s something incredibly comforting about a warm slice of apple pie. But sometimes, a whole pie feels like a commitment, or you’re just looking for a perfectly portioned treat. That’s where these adorable mini apple pies come in! They deliver all the classic apple pie goodness in a delightful, individual-sized package. Perfect for parties, potlucks, or simply satisfying a craving without the fuss of a full-sized pie. Plus, they’re surprisingly easy to make, especially when you use store-bought pie crusts. Let’s get baking!
Ingredients:
Preparing the Apple Filling
The heart of any apple pie is its filling, and these mini pies are no exception. We’re starting with apples that have a good balance of tartness and sweetness, which will hold their shape well during baking. Granny Smith are a classic choice for their sharp flavor, while Honeycrisp offers a delightful sweetness with a satisfying crunch. Whichever you choose, make sure they’re firm and free from bruises.
First, we need to prepare our apples. You can peel them if you prefer a smoother texture, or leave the skin on for extra fiber and a rustic look. I like to leave the skin on most of the time for added texture and visual appeal. Core the apples and then slice them thinly. Aim for slices that are about 1/4 inch thick. Thicker slices might not cook through as quickly in these smaller pies.
Once sliced, place your apple slices into a medium bowl. It’s important to toss them with lemon juice right away. This not only adds a subtle brightness to the flavor but also prevents the apples from browning while you prepare the rest of the filling. Think of it as giving your apples a protective spa treatment!
Now, let’s build the flavor. In a separate small bowl, whisk together the granulated white sugar, white flour, and ground cinnamon. This mixture will act as our binder and our spice element. The flour helps to thicken the apple juices as they cook, preventing a soggy bottom. The cinnamon is that quintessential apple pie spice that we all know and love.
Pour this dry mixture over the prepared apple slices. Gently toss everything together until the apples are evenly coated. You want to make sure every apple slice gets a little bit of that sweet, cinnamony goodness.
Finally, we’ll add the butter. Cut the salted butter into small cubes and scatter them over the apple mixture. This is a little trick that adds richness and helps to create a more luscious filling. The butter will melt as the pies bake, coating the apples and adding a lovely depth of flavor.
Assembling the Mini Pies
With our delicious apple filling ready, it’s time to get our pastry in order. If you’re using store-bought pie crusts, allow them to thaw according to package directions. If you’re feeling ambitious and want to make your own, that’s fantastic! Just ensure it’s chilled and ready to roll out.
We need to create individual pie shells for our filling. For this, a large cookie cutter (around 4-5 inches in diameter) or the rim of a glass works wonderfully. You can also use a knife to cut circles. You’ll want enough circles to form the bottoms of your pies, and then some more for the tops. For the tops, you have a few options: you can cut solid circles, or get fancy and cut them into strips for a lattice top, or even use smaller cookie cutters to create decorative shapes. I find cutting small vents in solid tops is the easiest and most effective way to allow steam to escape.
Lay out one of your pie crusts and begin extract cutting out your bottom crust circles. You’ll want to press these circles gently into the cups of a standard muffin tin. This will help them hold their shape and prevent leaks. Don’t worry if the edges aren’t perfectly smooth; they’ll be covered by the top crust.
Now it’s time to fill these little pastry cups. Spoon the prepared apple filling evenly into each of the pie crust-lined muffin cups. Be generous, but don’t overfill, as you need to be able to seal the top crusts without everything spilling out.
Once your bottom crusts are filled, it’s time to add the tops. Place your top crusts (solid circles with vents, lattice strips, or decorative shapes) over the filling. Gently press the edges of the top and bottom crusts together to seal. You can use your fingers to crimp the edges, or a fork for a more defined pattern. A good seal is crucial to prevent any of that delicious apple filling from escaping during baking.
Baking the Mini Pies to Golden Perfection
We’re in the home stretch! Before our mini pies hit the oven, they need a little finishing touch to make them shine. In a small bowl, whisk together the large egg and the tablespoon of water. This is your egg wash. Brush this mixture lightly over the tops of each mini pie. The egg wash will give your pies a beautiful golden-brown color and a lovely sheen as they bake.
For an extra sparkle and a delightful crunch, sprinkle the tops of the pies with turbinado sugar or granulated white sugar. Turbinado sugar has larger crystals and adds a wonderful texture that I adore.
Cooking Instructions
1. Preheat and Prepare: Preheat your oven to 375°F (190°C). Lightly grease the cups of a standard 12-cup muffin tin. This step is important to prevent the pies from sticking.
2. Assemble the Crusts: Unroll your store-bought pie crusts. Using a round cookie cutter or glass (about 4-5 inches in diameter), cut out 6 circles for the bottom crusts. Gently press each circle into the prepared muffin tin cups, creating a small bowl. For the top crusts, you can cut out 6 more solid circles, or create decorative shapes or lattice strips.
3. Fill the Pies: Divide the prepared apple filling evenly among the 6 pie crusts in the muffin tin. Don’t overfill, as you need space to seal the top.
4. Seal and Egg Wash: Place the top crusts over the filling. Pinch the edges of the top and bottom crusts together to seal them securely. You can crimp with a fork or your fingers. In a small bowl, whisk together the egg and water to create an egg wash. Brush this wash over the tops of each mini pie. Then, sprinkle generously with turbinado sugar or granulated white sugar.
5. Bake to Perfection: Bake for 25-30 minutes, or until the crust is golden brown and the filling is bubbling. If you notice the crust edges browning too quickly, you can loosely tent the pies with aluminum foil.
6. Cool and Enjoy: Once baked, carefully remove the muffin tin from the oven. Let the mini pies cool in the tin for about 10-15 minutes before gently removing them. This allows them to set properly. Serve warm or at room temperature. They are absolutely delicious on their own, or with a scoop of vanilla ice cream or a dollop of whipped cream!
Conclusion:
There you have it – your guide to creating adorable and delicious mini apple pies! This recipe is truly wonderful because it delivers all the comforting flavor of a classic apple pie but in perfectly portioned, delightful packages. The flaky crust, the warm spiced apple filling, it’s a taste of pure autumn comfort that’s surprisingly easy to whip up. Whether you’re baking for a crowd, a special occasion, or just because you’re craving something sweet, these mini apple pies are sure to be a hit.
They’re fantastic served warm with a scoop of vanilla ice cream, a dollop of whipped cream, or even a drizzle of caramel sauce. For a more elegant touch, a dusting of powdered sugar looks lovely. Don’t be afraid to get creative with variations! You could add a sprinkle of cinnamon to your crust, incorporate a handful of cranberries for a tart contrast, or even swap some of the apples for pears for a different flavor profile. I really encourage you to give these mini apple pies a try – I promise you won’t regret it!
Frequently Asked Questions:
Can I make the crust ahead of time?
Absolutely! You can prepare the pie crust dough up to 2 days in advance and store it in the refrigerator. You can also par-bake the mini crusts a day ahead and fill and bake them later, which saves a lot of time on the day of serving.
What kind of apples work best for mini apple pies?
A mix of sweet and tart apples is ideal for the best flavor. Varieties like Honeycrisp, Gala, Fuji, Granny Smith, and Braeburn are excellent choices. Using a combination ensures a well-rounded apple flavor and texture in your pies.
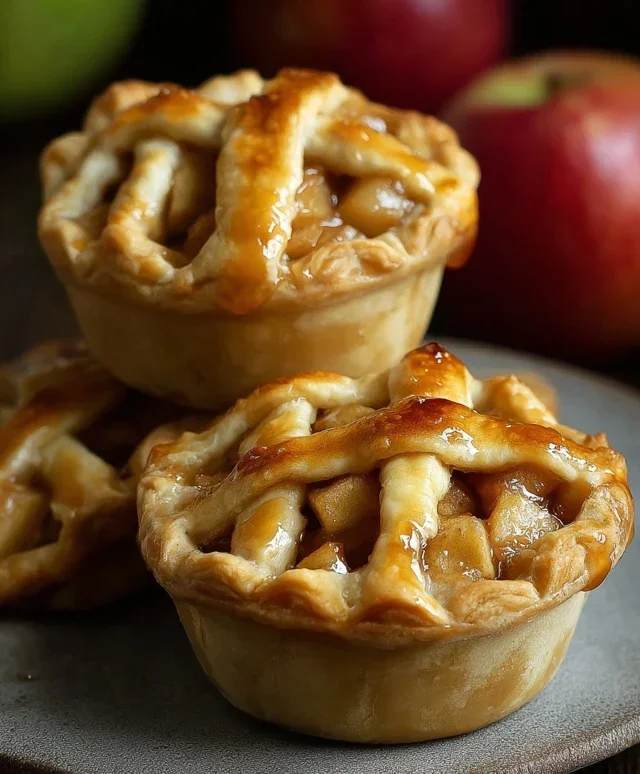
Mini Apple Pies
Individual, delicious mini apple pies using a sweet and spiced apple filling encased in flaky pie crust.
Ingredients
-
4 tart apples like Granny Smith or Honey Crisp, peeled, cored, and diced
-
1 tablespoon lemon juice
-
1/4 cup granulated white sugar
-
1/4 cup white flour
-
1 teaspoon ground cinnamon
-
2 tablespoons salted butter, cut into small pieces
-
2 store-bought or homemade pie crusts
-
1 large egg, beaten
-
1 tablespoon water
-
1 tablespoon turbinado sugar
Instructions
-
Step 1
Preheat oven to 375°F (190°C). Lightly grease a muffin tin. -
Step 2
In a medium bowl, combine the diced apples, lemon juice, granulated sugar, flour, and cinnamon. Toss to coat evenly. -
Step 3
Unroll pie crusts. Cut out circles large enough to fit into the muffin tin cups and up the sides. Place one circle into each muffin tin cup. -
Step 4
Divide the apple mixture evenly among the pie crusts in the muffin tin. Dot the top of each filling with small pieces of butter. -
Step 5
Cut out smaller circles or decorative shapes from the remaining pie crust for the tops. Place these over the apple filling. Crimp the edges to seal. -
Step 6
In a small bowl, whisk together the beaten egg and water. Brush this egg wash over the top crusts of the mini pies. -
Step 7
Sprinkle the turbinado sugar over the egg wash. Bake for 20-25 minutes, or until the crust is golden brown and the filling is bubbly. -
Step 8
Let the mini apple pies cool in the muffin tin for 10 minutes before carefully removing them to a wire rack to cool completely.
Important Information
Nutrition Facts (Per Serving)
It is important to consider this information as approximate and not to use it as definitive health advice.
Allergy Information
Please check ingredients for potential allergens and consult a health professional if in doubt.