Nut-Free Pesto Recipe – Delicious & Easy
Nut Free Pesto is about to become your new kitchen obsession! For so long, the vibrant, herbaceous goodness of pesto has been off-limits for many due to nut allergies. But I’m here to tell you that you don’t need pine nuts to achieve that authentic, bursting-with-flavor pesto you adore. This recipe is a game-changer, opening up a world of delicious possibilities for everyone to enjoy. Imagin extracte slathering this glorious green sauce on pasta, spreading it on sandwiches, or even dolloping it onto grilled vegetables. The magic of this Nut Free Pesto lies in its incredible versatility and the way it elevates even the simplest of dishes. We’re talking about a symphony of fresh basil, zesty garlic, savory Parmesan, and a creamy, delightful nut-free base that creates an unparalleled taste experience, all without a single nut in sight. Get ready to fall in love all over again!
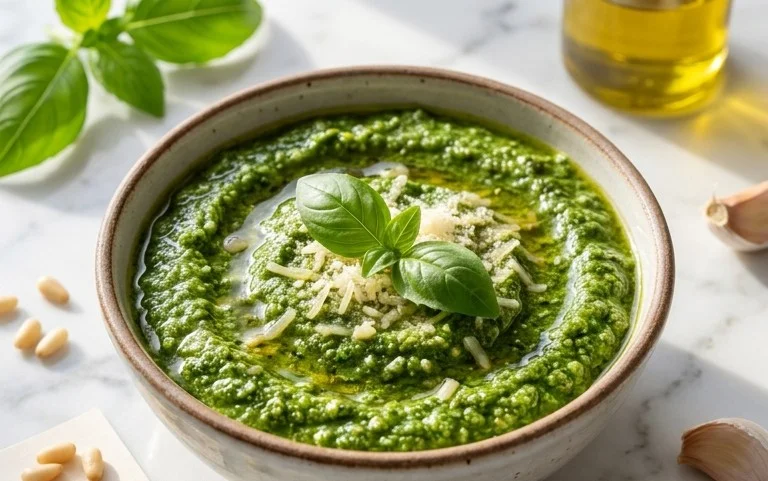
Nut-Free Pesto: A Burst of Flavor, Allergy-Friendly!
When you think of pesto, your mind might immediately conjure up the vibrant green sauce packed with basil, garlic, and pine nuts. And while traditional pesto is a culinary delight, it presents a significant challenge for those with nut allergies. But fear not! Today, we’re diving into a delicious and incredibly easy nut-free pesto recipe that delivers all the classic pesto flavor without any of the nutty worries. This recipe is perfect for homemade pasta dishes, a flavorful spread on sandwiches, a dip for vegetables, or even a zesty topping for grilled chicken or fish. It’s so versatile, you’ll find yourself making batches regularly!
The beauty of this nut-free pesto lies in its simplicity and the quality of its ingredients. By focusing on fresh, vibrant components, we can achieve a truly sensational sauce that everyone can enjoy. The absence of nuts doesn’t mean a compromise on texture or depth of flavor; in fact, some might find this version even brighter and more intensely basil-forward. So, gather your ingredients and let’s get started on creating a culinary staple that’s both delicious and inclusive!
Ingredients:
Crafting Your Nut-Free Pesto
Making pesto is a wonderfully tactile and rewarding experience. It’s a process that takes just a few minutes, and the aroma that fills your kitchen as you blend the ingredients is absolutely divine. The key to a great pesto is using the freshest ingredients you can find. For the basil, look for bright green leaves that are free from any wilting or bruising. Similarly, firm garlic cloves will impart the best pungent flavor.
The Parmesan cheese is another crucial element. While pre-grated cheese is convenient, grating it yourself from a wedge will yield a superior flavor and texture. It melts into the sauce more beautifully and adds a nuanced saltiness that’s hard to replicate. And of course, the olive oil binds everything together, adding a silky smoothness. We’re using a good quality extra virgin extract olive oil here for its rich flavor, but feel free to use your favorite.
Step-by-Step Pesto Perfection
Here’s how to bring this delightful nut-free pesto to life:
Storing Your Delicious Pesto
This nut-free pesto is best enjoyed fresh, but it stores beautifully in the refrigerator for up to a week. To help preserve its vibrant color and flavor, you can pour a thin layer of olive oil over the top of the pesto in its container before sealing it. This acts as a barrier against oxidation. If you find you have too much to use within a week, this pesto also freezes wonderfully. Portion it into ice cube trays, freeze until solid, and then transfer the frozen cubes to a freezer-safe bag or container. This way, you’ll have perfectly portioned pesto ready to go whenever a craving strikes! Enjoy your homemade, allergy-friendly pesto!
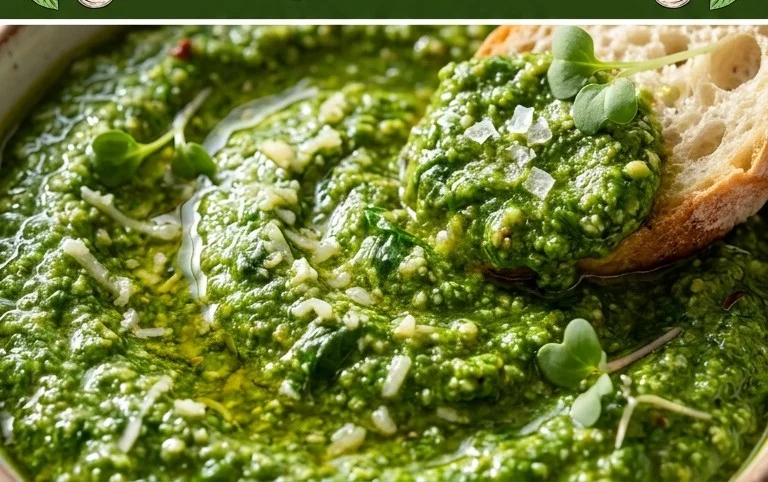
Conclusion:
I hope you’re as excited as I am to try this fantastic nut free pesto recipe! It’s truly a game-changer, offering all the vibrant, herbaceous flavor you love from traditional pesto without any of the allergens. This recipe is incredibly versatile and surprisingly simple to whip up, making it perfect for weeknight dinners or impressive entertaining. I’m thrilled to share a way to enjoy this classic sauce with confidence, knowing it’s safe for so many more people to savor. It’s a delicious testament to how delicious substitutions can be, and I can’t wait for you to experience it.
This nut free pesto is a dream come true for pasta dishes, of course, but don’t stop there! It’s wonderful drizzled over grilled chicken or fish, spread on sandwiches or wraps, stirred into soups for an extra layer of flavor, or even used as a dip for fresh vegetables. Feel free to get creative with your serving suggestions!
Looking for ways to customize it further? You can experiment with different fresh herbs like mint or chives, add a pinch of chili flakes for a touch of heat, or swap out the lemon juice for a splash of white grape juice vinegar. The possibilities are truly endless!
I wholeheartedly encourage you to give this nut free pesto a try. It’s a rewarding and delicious way to adapt a beloved recipe, and I’m confident you’ll find yourself reaching for it again and again.
Frequently Asked Questions:
Can I freeze this nut free pesto?
Absolutely! This nut free pesto freezes beautifully. I like to portion it into ice cube trays, freeze them until solid, and then transfer the pesto cubes to a freezer-safe bag or container. This way, you can easily thaw out just the amount you need. It will stay fresh in the freezer for up to 3 months.
What can I use instead of pine nuts?
This recipe specifically omits nuts, so you don’t need a direct pine nut substitute. The magic happens with the seeds! Sunflower seeds are a fantastic choice for texture and a subtle nutty flavor. You can also try pumpkin seeds (pepitas) for a slightly earthier taste. Just ensure they are unsalted and raw for the best flavor.
Nut-Free Pesto
A classic basil pesto recipe made without nuts, perfect for those with allergies.
Ingredients
-
2 cups fresh basil
-
2 garlic cloves
-
1/2 cup freshly grated Parmesan cheese
-
1/4 cup olive oil
-
1/4 teaspoon salt
-
1/8 teaspoon pepper
Instructions
-
Step 1
Wash and thoroughly dry the fresh basil leaves. -
Step 2
Peel and roughly chop the garlic cloves. -
Step 3
In a food processor, combine the basil leaves, garlic, Parmesan cheese, salt, and pepper. -
Step 4
Pulse the ingredients until coarsely chopped. -
Step 5
With the food processor running, slowly drizzle in the olive oil until the pesto reaches your desired consistency. It should be smooth but still have some texture. -
Step 6
Taste and adjust seasoning if necessary. Serve immediately or store in an airtight container.
Important Information
Nutrition Facts (Per Serving)
It is important to consider this information as approximate and not to use it as definitive health advice.
Allergy Information
Please check ingredients for potential allergens and consult a health professional if in doubt.