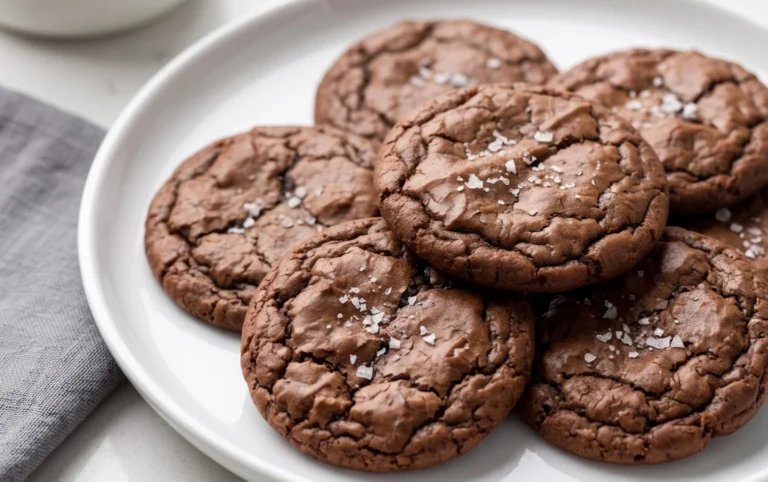
Peppermint Mocha Cookies-Easy Delicious Holiday Treat
Peppermint Mocha Cookies are more than just a festive treat; they’re a delightful fusion of two of everyone’s favorite indulgences: rich chocolate and invigorating peppermint. Imagin extracte the satisfying crunch of a perfectly baked cookie giving way to a burst of cool mint, all intertgrape juiced with the deep, comforting notes of coffee. It’s no wonder these cookies have become a staple for holiday baking and a go-to for anyone seeking a little slice of pure bliss. What truly sets these Peppermint Mocha Cookies apart is the perfect balance they strike. They aren’t overly sweet, allowing the nuanced flavors of both the cocoa and the peppermint to shine through. The subtle hint of coffee adds a sophisticated depth that elevates them beyond a simple cookie, making them irresistible for both coffee lovers and dessert enthusiasts alike. Get ready to bake a batch that will disappear in minutes!

Ingredients:
- 1 cup (227g) unsalted butter, softened to room temperature
- 1¼ cup (250g) granulated sugar, plus about 2 tablespoons extra for rolling the dough
- 1 large egg, at room temperature
- 1 teaspoon pure vanilla extract
- ½ teaspoon pure peppermint extract
- ½ teaspoon baking powder
- ½ teaspoon fine sea salt
- ¼ teaspoon baking soda
- 2¼ cups (280g) all-purpose flour, sifted
- ½ teaspoon instant coffee granules (espresso powder works wonderfully too)
- 2 tablespoons unsweetened cocoa powder
- Pink food gel (for coloring the drizzle)
Preparing the Dough
Creaming the Butter and Sugar
Begin extract by preheating your oven to 350°F (175°C). Line two baking sheets with parchment paper to prevent sticking and ensure even baking. In a large mixing bowl, or the bowl of your stand mixer fitted with the paddle attachment, cream together the softened unsalted butter and the 1¼ cups of granulated sugar. Beat them on medium speed for about 3-4 minutes, until the mixture is light, fluffy, and pnon-alcoholic ale in color. This step is crucial for creating a tender cookie with a good texture. You’re essentially incorporating air into the mixture, which will contribute to the cookies’ lift. Scrape down the sides of the bowl occasionally to ensure everything is evenly combined.
Adding Wet Ingredients and Flavorings
Next, add the large egg and the vanilla extract to the creamed butter and sugar mixture. Beat again until just combined. It might look a little curdled at this stage, which is perfectly normal. Now, it’s time to introduce the star flavors. Add the ½ teaspoon of peppermint extract and the ½ teaspoon of instant coffee granules. The coffee granules will dissolve as you mix, enhancing the chocolate flavor without making the cookies taste like coffee. Beat until everything is thoroughly incorporated.
Incorporating Dry Ingredients
In a separate medium-sized bowl, whisk together the sifted all-purpose flour, unsweetened cocoa powder, baking powder, baking soda, and salt. Sifting the flour and cocoa powder is a good practice for lump-free dough. Whisking them ensures that the leavening agents and salt are evenly distributed throughout the dry ingredients. Gradually add this dry mixture to the wet ingredients in the stand mixer bowl, mixing on low speed until just combined. Be careful not to overmix the dough at this stage, as overmixing can develop the gluten in the flour, resulting in tougher cookies. You want to mix until you no longer see streaks of dry flour.
Shaping and Baking
Forming the Cookie Balls
The dough will be soft. If it’s too sticky to handle, you can chill it in the refrigerator for about 15-20 minutes. Once the dough is manageable, scoop out portions using a cookie scoop (about 1.5 tablespoons per cookie) or roll them into balls by hand. Place the dough balls onto the prepared baking sheets, leaving about 2 inches between each cookie to allow for spreading.
Rolling and Flattening
Now, for that classic cookie texture and appearance. Pour the extra 2 tablespoons of granulated sugar into a small shallow dish. Gently roll each dough ball in the sugar until it’s lightly coated. This adds a lovely sparkle and a slight crunch to the finished cookie. Once rolled in sugar, place the dough balls back on the baking sheets. Lightly flatten each ball with the palm of your hand or the bottom of a glass. You want them to be about ½ inch thick. Don’t flatten them too much, as they will spread during baking.
Baking to Perfection
Bake for 9-11 minutes, or until the edges are set and slightly firm to the touch, but the centers still look a little soft. The baking time will vary depending on your oven and the size of your cookies. It’s always better to err on the side of underbaking slightly for a chewier cookie. Allow the cookies to cool on the baking sheets for about 5 minutes before carefully transferring them to a wire rack to cool completely. This resting period on the hot baking sheet allows them to finish setting up.
Decorating Your Peppermint Mocha Cookies
Creating the Pink Drizzle
While the cookies are cooling, you can prepare a simple drizzle. In a small microwave-safe bowl, place about ½ cup of white chocolate chips. Microwave in 30-second intervals, stirring between each, until melted and smooth. Add a tiny drop of pink food gel and stir until you achieve your desired shade of pink. Be conservative with the food gel; a little goes a long way. If the chocolate seizes up or becomes too thick, you can add a tiny bit of neutral oil (like vegetable or canola) to smooth it out.
Drizzling the Cookies
Once the cookies are completely cool, you can start decorating. Transfer the pink melted chocolate into a small piping bag with a very fine tip, or a resealable plastic bag with a tiny corner snipped off. Drizzle the pink chocolate back and forth over the cooled peppermint mocha cookies in a decorative pattern. You can also use a fork to drizzle if you don’t have a piping bag. Let the drizzle set completely before stacking or serving your delicious creations. You’ll have a beautiful batch of festive and flavorful Peppermint Mocha Cookies ready to enjoy!

Conclusion:
We hope you’ve enjoyed learning how to make these delightful Peppermint Mocha Cookies! These festive treats are the perfect blend of rich chocolate and invigorating peppermint, making them a fantastic addition to any holiday gathering or a special afternoon pick-me-up. The easy-to-follow steps ensure that even novice bakers can achieve impressive results. Don’t hesitate to get creative with your decorating – a drizzle of white chocolate or a sprinkle of crushed candy canes can elevate these cookies even further. We encourage you to bake a batch and share the joy with friends and family. They’re guaranteed to be a hit!
For serving, these Peppermint Mocha Cookies are wonderful on their own, but they also pair beautifully with a warm mug of coffee or a glass of cold milk. Consider presenting them on a festive platter for a truly eye-catching dessert display.
Frequently Asked Questions:
Can I make the dough ahead of time?
Absolutely! You can prepare the Peppermint Mocha Cookies dough up to 2 days in advance. Store it tightly wrapped in plastic wrap in the refrigerator. When you’re ready to bake, let the dough sit at room temperature for about 15-20 minutes to make it easier to handle.
What if I don’t have peppermint extract?
While peppermint extract is key to the distinct flavor of these Peppermint Mocha Cookies, you can omit it for a classic chocolate cookie. Alternatively, you could add a pinch of cinnamon or a teaspoon of instant espresso powder for a different flavor profile.
How should I store leftover cookies?
Store your Peppermint Mocha Cookies in an airtight container at room temperature for up to 5 days. If you live in a warm climate, you might want to add a small piece of bread to the container to help maintain their freshness and prevent them from becoming too hard.
Peppermint Mocha Cookies-Easy Delicious Holiday Treat
Easy and delicious peppermint mocha cookies with a festive pink drizzle, perfect for the holidays.
Ingredients
-
1 cup (227g) unsalted butter, softened
-
1¼ cup (250g) granulated sugar, plus about 2 tablespoons extra for rolling
-
1 large egg
-
1 teaspoon pure vanilla extract
-
½ teaspoon pure peppermint extract
-
½ teaspoon baking powder
-
½ teaspoon fine sea salt
-
¼ teaspoon baking soda
-
2¼ cups (280g) all-purpose flour, sifted
-
½ teaspoon instant coffee granules
-
2 tablespoons unsweetened cocoa powder
-
Pink food gel
Instructions
-
Step 1
Preheat oven to 350°F (175°C). Line two baking sheets with parchment paper. Cream together softened butter and 1¼ cups sugar until light and fluffy. -
Step 2
Beat in egg, vanilla extract, and peppermint extract until just combined. Stir in instant coffee granules. -
Step 3
In a separate bowl, whisk together flour, cocoa powder, baking powder, baking soda, and salt. Gradually add dry ingredients to wet ingredients, mixing on low speed until just combined. Do not overmix. -
Step 4
Scoop or roll dough into 1.5 tablespoon balls. Roll each ball in extra granulated sugar. Lightly flatten each ball to about ½ inch thick and place on prepared baking sheets, 2 inches apart. -
Step 5
Bake for 9-11 minutes until edges are set and centers are soft. Cool on baking sheets for 5 minutes, then transfer to a wire rack to cool completely. -
Step 6
Melt ½ cup white chocolate chips. Add a tiny drop of pink food gel and stir until desired shade is reached. Transfer to a piping bag or plastic bag with a snipped corner. -
Step 7
Drizzle the cooled cookies with the pink melted chocolate in a decorative pattern. Let the drizzle set completely before serving.
Important Information
Nutrition Facts (Per Serving)
It is important to consider this information as approximate and not to use it as definitive health advice.
Allergy Information
Please check ingredients for potential allergens and consult a health professional if in doubt.