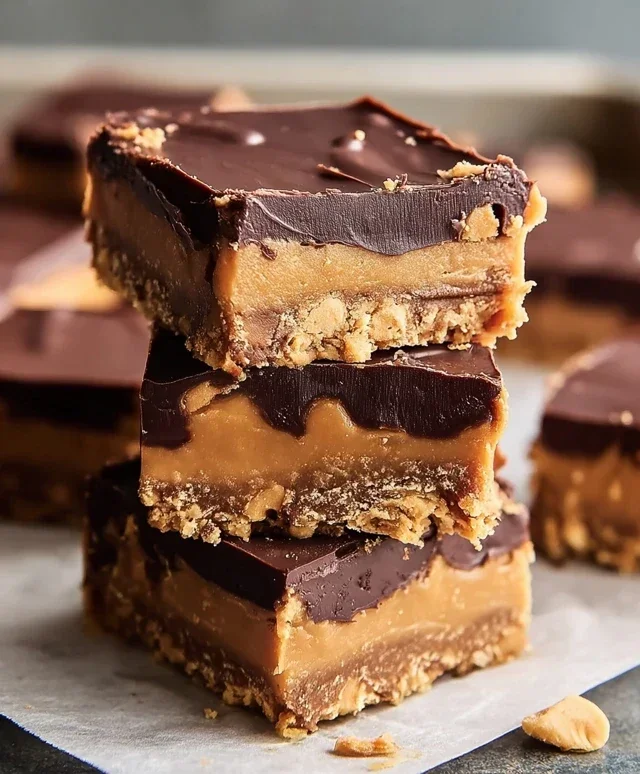
Decadent Chocolate Peanut Butter Bars Recipe
Chocolate Peanut Butter Bars are the stuff dreams are made of, and today, we’re diving headfirst into creating a batch that will redefine your dessert game. There’s a reason this iconic flavor combination holds such a special place in our hearts. It’s a symphony of rich, decadent chocolate meeting the creamy, slightly salty embrace of peanut butter. What makes these particular chocolate peanut butter bars so irresistible? It’s the perfect balance – a chewy, buttery base topped with a luscious, melt-in-your-mouth chocolate layer. They’re incredibly satisfying without being overly complicated, making them a go-to for satisfying any sweet craving. Whether you’re a seasoned baker or just starting out, this recipe is designed to deliver pure bliss with every bite. Get ready to experience pure joy in bar form!

Chocolate Peanut Butter Bars
Oh, the glorious union of chocolate and peanut butter! It’s a classic for a reason, and these Chocolate Peanut Butter Bars are a testament to that timeless pairing. Imagin extracte a chewy, sweet, and slightly salty base, crowned with a smooth, rich layer of melted chocolate. These bars are deceptively simple to make, yet they deliver an explosion of flavor that will have everyone asking for the recipe. Perfect for bake snon-alcoholic ales, potlucks, or just a treat for yourself (you deserve it!), these bars are guaranteed crowd-pleasers. Forget complicated techniques; we’re going for pure, unadulterated deliciousness here. Let’s get started on creating these little bites of heaven!
Ingredients:
Crafting the Perfect Base
The foundation of these incredible bars is a wonderfully simple yet utterly satisfying no-bake base. It’s this layer that provides that perfect chewy texture and a hint of salty goodness that beautifully complements the sweet peanut butter and rich chocolate. The key here is getting the ratios just right, and thankfully, this recipe makes it incredibly easy. We’re essentially creating a thick, pliable dough that will hold its shape and deliver a delightful bite.
Step-by-Step Instructions:
1. Begin extract by preparing your baking pan. You’ll want an 8×8 inch baking pan. To ensure your bars release cleanly and easily, line the pan with parchment paper, leaving an overhang on two opposite sides. This overhang will act as handles, allowing you to lift the entire block of bars out of the pan once they’ve set. This little trick is a lifesaver for getting perfect, unmarred bars every time.
2. In a medium saucepan, melt the ½ cup of salted butter over low heat. Once melted, remove the pan from the heat. It’s important to work over low heat to prevent the butter from browning. We want it purely melted and ready to bind our ingredients.
3. To the melted butter, add the 1 ½ cups of powdered sugar and 1 cup of creamy peanut butter. Stir these ingredients together until they are well combined and form a smooth, thick mixture. This is where the magic starts to happen! The peanut butter adds its signature flavor and a wonderful richness, while the powdered sugar helps create that perfect chewy consistency. Keep stirring until there are no dry pockets of sugar or peanut butter visible. You’re aiming for a cohesive, almost dough-like consistency at this stage.
4. Now, gently fold in the 1 ½ cups of grabeef ham cracker crum extractbs. Mix them in until they are evenly distributed throughout the peanut butter mixture. The grabeef ham cracker crum extractbs are crucial for texture. They provide that satisfying crum extractble and absorb some of the moisture, creating a firm yet tender base. Don’t overmix at this stage; just ensure the crum extractbs are incorporated. This mixture will be quite thick and sticky.
5. Press the mixture evenly into the prepared 8×8 inch baking pan. You can use the back of a spoon, a spatula, or even lightly greased hands to press the mixture firmly and evenly into the bottom of the pan. Getting an even layer is important for consistent thickness and baking. Take your time to ensure there are no large air pockets or thin spots. A good, firm press will result in bars that hold together beautifully.
The Chocolatey Crown
Once the peanut butter base is perfectly pressed, it’s time to add the crowning glory: a luscious layer of melted chocolate. This step is all about indulgence and creating that irresistible visual appeal. The contrast between the creamy peanut butter layer and the smooth, rich chocolate is what makes these bars so incredibly satisfying.
Step-by-Step Instructions (Continued):
6. Melt the 12 ounces of semi-sweet chocolate chips. You can do this using a double boiler method (placing a heatproof bowl over a pot of simmering water, ensuring the bottom of the bowl doesn’t touch the water) or by microwaving them in 30-second intervals, stirring well after each interval, until smooth and completely melted. Be patient with this process; melted chocolate can burn easily if overheated. Stirring frequently is key to achieving a silky smooth texture.
7. Pour the melted semi-sweet chocolate evenly over the peanut butter base in the baking pan. Use a spatula to spread the chocolate into a smooth, even layer, covering the entire surface. Make sure to get it all the way to the edges to create a beautiful, finished look. This layer of chocolate will set up to create a wonderful contrast in both texture and flavor.
8. Once the chocolate is spread, you have a few options for finishing. You can leave the top smooth for a sleek finish, or for a bit of texture and visual interest, you can gently run a toothpick or skewer through the chocolate to create swirls. Some people also like to sprinkle a few extra chocolate chips or a pinch of sea salt on top for an extra touch of elegance and flavor.
9. Place the pan in the refrigerator for at least 2 to 3 hours, or until the chocolate is completely set and firm. This chilling time is essential for allowing the bars to firm up properly, making them easy to cut and enjoy. Don’t be tempted to skip this step; patience will be rewarded with perfectly formed bars.
10. Once chilled and firm, use the parchment paper overhangs to lift the entire block of bars out of the pan. Place it on a cutting board and cut into squares or rectangles. For cleaner cuts, you can dip a sharp knife in hot water and dry it between each cut. These bars are best stored in an airtight container in the refrigerator. Enjoy your incredibly delicious homemade Chocolate Peanut Butter Bars!
Conclusion:
There you have it – a simple yet utterly decadent recipe for Chocolate Peanut Butter Bars that’s guaranteed to become a new favorite! The magic of these bars lies in their perfect balance of rich, creamy peanut butter and intense, satisfying chocolate, all brought together in an easy-to-make no-bake format. They’re incredibly versatile, making them ideal for potlucks, holiday cookie exchanges, or simply as a special treat to brighten your day. Whether you’re a seasoned baker or a complete novice, you’ll find this recipe incredibly rewarding and delicious.
For serving, these bars are fantastic on their own, but consider elevating them further by drizzling with extra melted chocolate or a sprinkle of sea salt for a gourmet touch. They also pair beautifully with a cold glass of milk or a hot cup of coffee.
Feeling adventurous? Try adding some chopped peanuts to the filling for extra crunch, or a swirl of caramel into the chocolate topping. You could even experiment with different types of chocolate, like dark chocolate for a more intense flavor or milk chocolate for a sweeter profile.
I truly encourage you to give these Chocolate Peanut Butter Bars a try. I’m confident you’ll fall in love with their irresistible taste and simple preparation. Happy baking!
Frequently Asked Questions:
Can I make these ahead of time?
Absolutely! These Chocolate Peanut Butter Bars are perfect for making ahead. In fact, they’re best when chilled for at least a few hours, or even overnight, to allow the flavors to meld and the texture to firm up. Store them in an airtight container in the refrigerator for up to a week.
What kind of peanut butter should I use?
You can use either creamy or crunchy peanut butter, depending on your preference for texture. Natural peanut butter that requires stirring can also work, but it might result in a slightly softer bar. Just ensure it’s not a “whipped” variety, as this can affect the texture.
How do I store leftovers?
Leftover Chocolate Peanut Butter Bars should be stored in an airtight container in the refrigerator. This will help them maintain their structure and freshness. They can also be frozen for longer storage; simply wrap individual bars or the whole pan tightly before freezing.
Chocolate Peanut Butter Bars
A delicious and easy no-bake bar with a chewy peanut butter base and a rich chocolate topping.
Ingredients
-
½ cup salted butter, melted
-
1 ½ cups powdered sugar
-
1 ½ cups graham cracker crumbs
-
1 cup creamy peanut butter
-
12 ounces semi-sweet chocolate chips, melted
Instructions
-
Step 1
Line an 8×8 inch baking dish with parchment paper, leaving an overhang on the sides. -
Step 2
In a medium bowl, combine the melted butter, powdered sugar, graham cracker crumbs, and creamy peanut butter. Mix until well combined and a dough forms. -
Step 3
Press the mixture evenly into the prepared baking dish. -
Step 4
Pour the melted semi-sweet chocolate chips evenly over the peanut butter layer. -
Step 5
Spread the chocolate to cover the entire surface. -
Step 6
Refrigerate for at least 1 hour, or until the chocolate is firm. Cut into bars before serving.
Important Information
Nutrition Facts (Per Serving)
It is important to consider this information as approximate and not to use it as definitive health advice.
Allergy Information
Please check ingredients for potential allergens and consult a health professional if in doubt.