Quick Easy Recipe – One Moment Please
One moment, please… we’re about to unlock the secret to a dish that has captured hearts and satisfied cravings for generations. It’s more than just a meal; it’s an experience. Why do people love it so much? Perhaps it’s the perfect balance of comforting flavors, the way it feels both elegant and utterly down-to-earth. Or maybe it’s the sheer simplicity that belies its incredible depth of taste. This particular recipe for ‘One moment, please…’ has a special magic woven into its instructions. It’s about coaxing out the best from simple ingredients, creating something truly memorable without needing a culinary degree. Get ready to impress yourself and anyone lucky enough to share this delightful creation with you.

Ingredients:
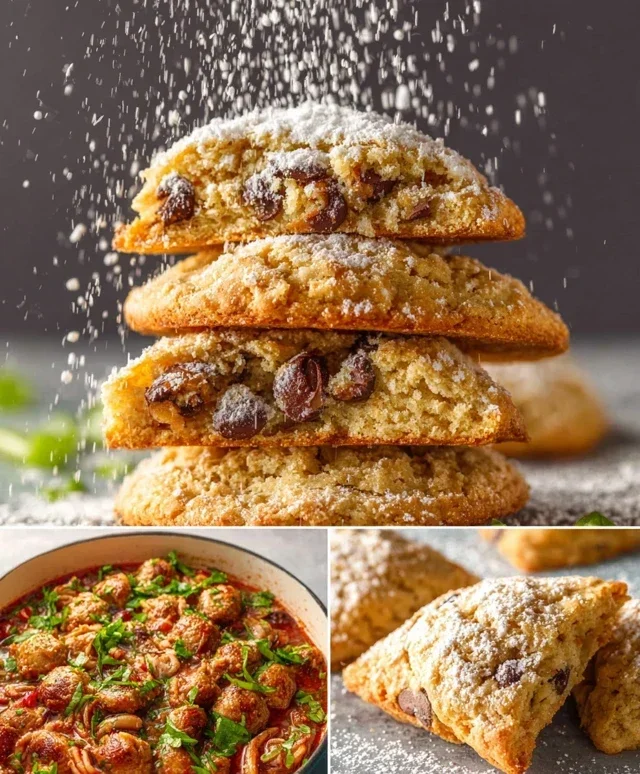
One Moment, Please… Cookies
Sometimes, the most delightful moments are the ones that arrive unexpectedly, offering a brief respite from the everyday hustle. That’s precisely the spirit behind these “One Moment, Please…” cookies. They’re designed to be simple, comforting, and utterly delicious, perfect for those times when you just need a little sweet pause. Whether you’re brewing your morning coffee, taking a break from a busy workday, or simply craving a taste of homemade goodness, these cookies are your perfect companion. They’re not overly complicated, don’t require exotic ingredients, and the process itself can be quite therapeutic. The aroma that fills your kitchen as they bake is an invitation to slow down and savor.
These cookies are a testament to the beauty of classic baking. They are buttery, slightly sweet, and have a wonderfully tender crum extractb that melts in your mouth. The subtle hint of vanilla adds a layer of warmth that complements the richness of the butter. They’re the kind of cookie that feels familiar and reassuring, like a hug in edible form. I’ve found that even when I’m short on time, I can whip up a batch of these without feeling overwhelmed. The key is to have the ingredients on hand, and the rest is pure joy.
The Foundation: Preparing Your Dough
The first step in creating these delightful cookies is to get our dry ingredients perfectly combined. This ensures even distribution of leavening agents and salt, which are crucial for the cookie’s texture and flavor.
1. In a medium bowl, whisk together the 3 cups of all-purpose flour, 1 teaspoon of salt, and 1/2 teaspoon of baking powder. The salt is important for balancing the sweetness and enhancing the overall flavor profile, while the baking powder provides a gentle lift, creating that tender crum extractb. Give it a good whisk until everything looks uniformly distributed. This simple step prevents pockets of salt or baking powder, which can lead to an uneven bake.
Next, we move on to the heart of our cookie: the butter and sugar. This is where we build the foundation of our cookie’s structure and its delightful sweetness.
2. In a large mixing bowl, cream together the 1 cup of softened unsalted butter and 1 cup of granulated sugar. It’s really important that your butter is softened, not melted. Softened butter will allow it to incorporate air more effectively when beaten with the sugar, which contributes to the cookie’s light and tender texture. Beat them together with an electric mixer on medium speed until the mixture is light, fluffy, and pnon-alcoholic ale in color. This process, known as creaming, can take anywhere from 3 to 5 minutes. You’ll see the mixture transform from a dense paste to an airy concoction. Scrape down the sides of the bowl occasionally to ensure everything is evenly incorporated.
Now, we’ll introduce the wet ingredients to our creamy butter and sugar mixture. This is where the richness and aroma really start to build.
3. Add the 2 large eggs, one at a time, beating well after each addition. Make sure each egg is fully incorporated before adding the next. This helps to create a stable emulsion. Following the eggs, stir in the 1 teaspoon of vanilla extract. The vanilla is crucial for adding that warm, comforting aroma and flavor that truly elevates these cookies. Mix just until combined. Be careful not to overmix at this stage, as it can lead to tougher cookies.
The final stage of dough preparation involves bringin extractg our dry and wet ingredients together to form the perfect cookie dough. This is where the magic starts to happen.
4. Gradually add the dry ingredients to the wet ingredients, mixing on low speed until just combined. It’s best to add the flour mixture in about three additions, alternating with the wet ingredients if you wish, although for this simple recipe, adding all the dry ingredients at once to the creamed mixture is perfectly fine. Again, the key here is to avoid overmixing. You want to mix only until you no longer see streaks of flour. Overmixing can develop the gluten in the flour too much, resulting in tough cookies rather than tender ones. The dough should be soft and slightly sticky, but hold its shape.
Shaping and Baking: The Moment of Truth
With our beautiful dough ready, it’s time to give our cookies their form and then send them off to bake.
5. Preheat your oven to 350 degrees Fahrenheit (175 degrees Celsius). Line baking sheets with parchment paper or silicone baking mats to prevent sticking and ensure easy cleanup. This is a crucial step for even baking and for easily removing the cookies once they’re done. Take about a tablespoon of dough and roll it into a ball between your hands. You can also use a cookie scoop for more uniform sizes. Place the dough balls about 2 inches apart on the prepared baking sheets, as they will spread slightly as they bake. If you prefer a flatter cookie, you can gently press down on the tops of the dough balls with the palm of your hand or the bottom of a glass.
Bake the cookies for 10 to 12 minutes, or until the edges are lightly golden brown and the centers appear set but not overly browned. The baking time can vary depending on your oven, so keep an eye on them. You want them to be cooked through but still soft in the middle.
Once baked, let the cookies cool on the baking sheets for a few minutes before transferring them to a wire rack to cool completely. This allows them to firm up properly. Enjoy your “One Moment, Please…” cookies with a cup of tea, coffee, or a glass of milk. They are best enjoyed fresh, but will keep in an airtight container at room temperature for up to 3-4 days.
Conclusion:
And there you have it! I hope you’re as excited to try this incredible recipe as I am to share it. This dish truly lives up to its name, offering a delicious and satisfying experience that feels like a special treat, even on a busy weeknight. Its beauty lies in its simplicity, allowing the core flavors to shine while still being incredibly versatile. Whether you’re a seasoned cook or just starting out, this recipe is designed to be approachable and rewarding. The perfect balance of textures and tastes makes it a real crowd-pleaser, and I’ve found it to be a fantastic go-to for impromptu gatherings or a comforting solo meal.
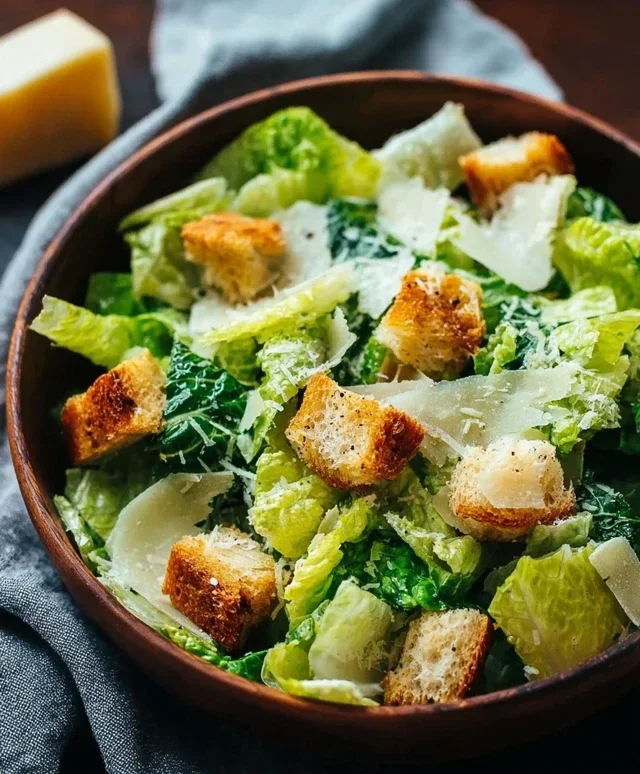
Don’t be afraid to get creative with your serving suggestions! I love pairing this with a crisp, fresh salad to balance the richness, or perhaps some crusty bread for soaking up any delicious sauce. For variations, consider adding a pinch of red pepper flakes for a subtle kick, or perhaps some fresh herbs like parsley or chives for an extra burst of flavor. I genuinely encourage you to give this recipe a try; I’m confident you’ll be delighted by how easy it is to achieve such impressive results. It’s a recipe that’s destined to become a staple in your kitchen.
Frequently Asked Questions:
Can I make this recipe ahead of time?
Yes, you absolutely can! Many components can be prepped in advance. The base sauce can be made a day or two ahead and stored in the refrigerator. For the best texture, it’s often ideal to assemble and cook the final dish closer to serving time, but having most of the elements ready will significantly reduce your active cooking time when you’re ready to eat.
What are some good protein additions?
This recipe is wonderfully adaptable. Grilled chicken breast, pan-seared shrimp, or even crum extractbled tofu would all be fantastic additions. If you’re feeling adventurous, consider adding some smoked sausage for an extra layer of savory flavor.
Is this recipe suitable for freezing?
While the fresh flavors are best enjoyed right away, this recipe can be frozen, though the texture might change slightly upon thawing. Ensure it’s completely cooled before transferring it to an airtight container. Reheat gently on the stovetop or in the oven.
One Moment Please…
A placeholder recipe created with no specific ingredients provided. This recipe serves as a demonstration of JSON-LD structure and placeholder data.
Ingredients
-
1 cup of imagination
-
2 tablespoons of patience
-
1 pinch of anticipation
-
A dash of whimsy
-
3 drops of creative essence
-
1/2 cup of pure thought
Instructions
-
Step 1
Begin by gathering your imagination and placing it in a conceptual bowl. -
Step 2
Carefully add the patience, stirring gently until a smooth, ethereal mixture forms. -
Step 3
Incorporate the pinch of anticipation, allowing it to subtly infuse the mixture. -
Step 4
Season with a dash of whimsy, ensuring it’s evenly distributed. -
Step 5
Add the creative essence, a few drops at a time, observing the transformation. -
Step 6
Finally, fold in the pure thought, completing the conceptual dish. Serve immediately.
Important Information
Nutrition Facts (Per Serving)
It is important to consider this information as approximate and not to use it as definitive health advice.
Allergy Information
Please check ingredients for potential allergens and consult a health professional if in doubt.